Now that you’ve imported the needed templates, it’s time for the final step in building your website with Starter Templates. Therefore, the only thing left is to replace the template (dummy) content with your own and to personalize your website. Further, you can modify the design to adjust it to your brand and needs.
This document will help you understand the basics of template designs and how you can edit them.
Starter Templates Walkthrough Docs:
- Getting Started With Starter Templates
- Starter Templates Importing
- How to Import A Complete Site With Starter Templates?
- How to Import Single Page With Starter Templates?
- Importing Gutenberg Pages, Patterns, and Wireframes
- Starter Templates – Elementor Popup
- How to Fix Starter Template Importing Issues
- Building Your Website With Starter Templates (currently reading)
- Starter Templates FAQs
General Guidelines for Modifying Starter Templates
Starter Templates contain page designs and dummy content made by our design team. In addition, templates come with all needed plugins and website settings (Customizer, plugins). Once a template is imported, you’re free to modify it any way you need.
Here are some general guidelines that can help you modify templates:
- The content (pages, posts) is created using the respective page builder. You can edit content using the page builder you selected when importing the template;
- Header and Footer are created using Astra’s Header Footer builder. You can customize them at Appearance > Customize > Header Builder or Footer Builder ;
- Sidebars are added via the Customizer. You can customize this at Appearance > Customize > Sidebar ;
- Layout, fonts, colors, button settings are all set in the Customizer. You can edit them at Appearance > Customize > Global ;
- Content for third-party plugins like WooCommerce or LearnDash is created through these plugins and will be located within these plugins;
- Pages for third-party plugins like WooCommerce or LearnDash can be additionally customized in the Customizer under their respective settings.
Understanding Designs
Some designs are pretty straightforward to modify. Accordingly, you can change just a few Customizer settings or edit the design with the page builder as usual.
But sometimes, our designers use more complex solutions to provide you with such great designs. Hence, you don’t have to worry about needing additional plugins or access when you import a complete site. Everything we used for creating the templates was added to your website when you imported a template.
On the other hand, modifying these complex designs might get you puzzled sometimes. Designs might be achieved as a combination of Customizer and page builder settings or could be created using some plugin.
Thus, you should check installed plugins after the template import as a good starting point. Since Starter Templates import installs only necessary plugins, you could identify any plugin used in designs. Next, you should inspect the customizer and global page builder settings, as well as pictures and backgrounds.
Further down, we will explain several principles that could come in handy when trying to understand Starter Templates design.
Editing Templates After The Complete Site Import
To clarify, we made the example below to help you understand better how complex designs are created. Also, we will show you how to modify them.
Here, we used a Travel Agency template for Elementor. Once you import the Travel Agency template, you might notice the vertical lines. These lines are stretching from the top to the bottom of all website pages. We will show you how you could remove them:
Customizer Settings
Step 1 – All sections without a set background are transparent. In other words, you will see the global website background. You can edit the website background at Appearance > Customize > Global > Colors > Background.
Step 2 – Next, click on the Background color picker, and then on the “Image” tab.
Step 3 – Here, check out the background image. You will see that the lines are coming from a full-screen picture. Click on the “Remove Image” button.
This will remove the website background. As a result, all transparent sections will now look like this:
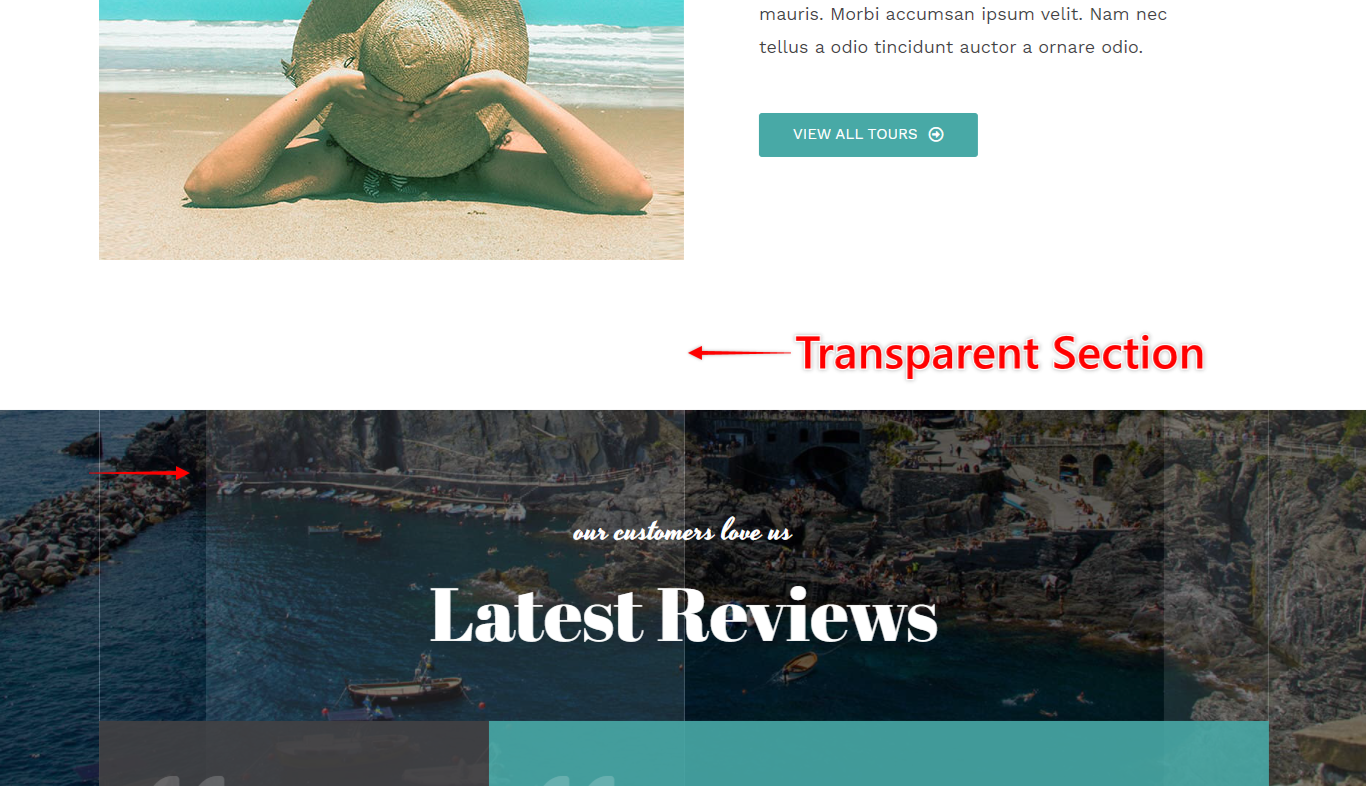
As you can see, the lines disappeared from some sections but are still present in others.
As mentioned earlier, the Elementor sections with the transparent background showed the website background image that we removed. This means, that in other sections, the lines in the background are coming from a different place. So, we should take a look at Elementor settings.
Editing With Elementor
Since the remaining sections are not transparent, so we will check their background settings in Elementor editor:
Step 4 – Navigate to your page, and click on “Edit with Elementor”;
Step 5 – Next, click on “Edit Section” for the sections still showing lines in the background;
Step 6 – Here, navigate to the “Style” tab and scroll down to the “Background Overlay”. Finally, you will see the lines are added as an overlay image. Click on the “Remove” (Trash Can) icon to delete the image:

In this example, we showed you how to edit a design that combines Customizer and Elementor settings. Similarly, you can check out and edit designs in any template.
Replacing Images
When modifying the design, most often you’ll need to edit images. Here also, it’s important to mention that page or post designs are created in layers. Thus, check for images in sections, columns, and other elements when you edit your page with any page builder.
To illustrate this, we’ll show you examples of sections designed with Elementor.
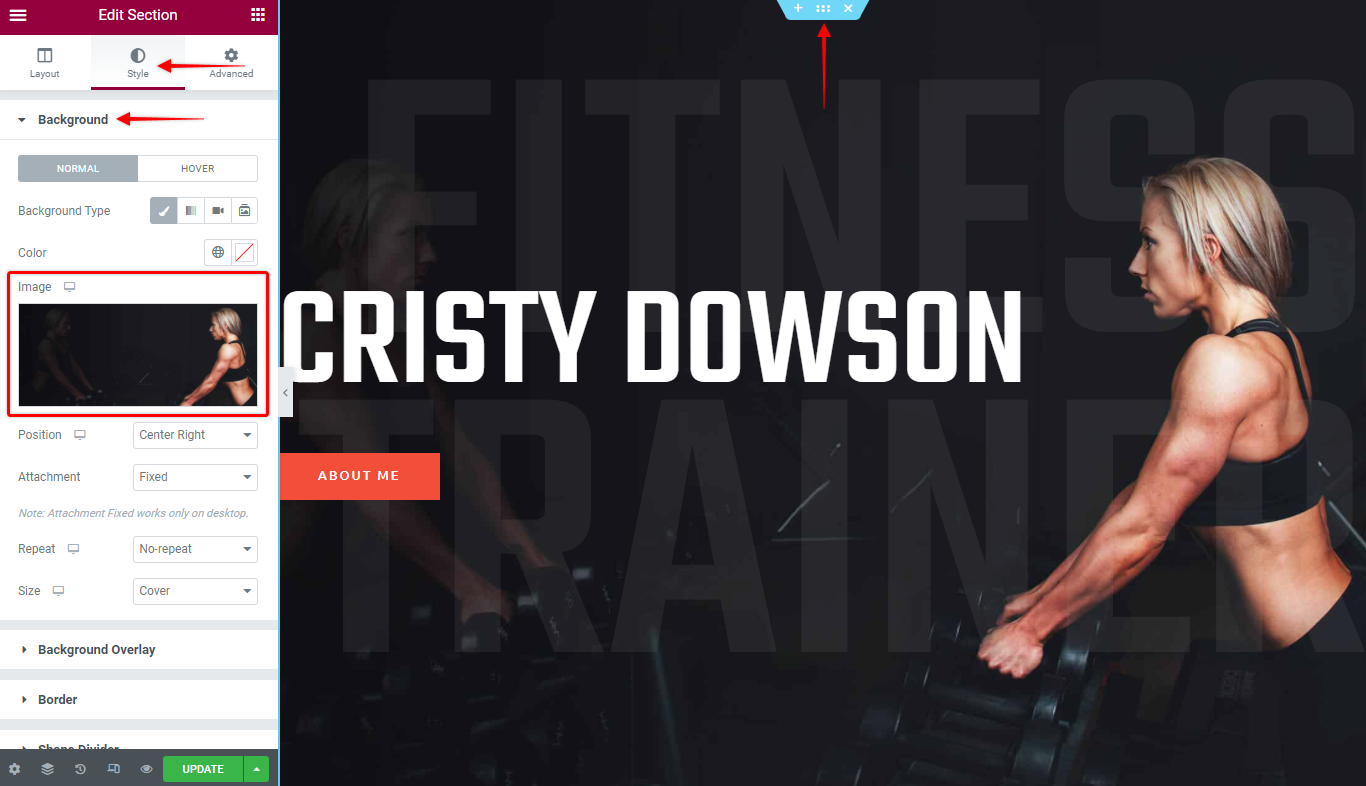
Example 1 – Section Backgorund
In this example, we will show you how a section was built using the section background. The section was built using several layers:
- Section with the background;
- Heading (Fitness Trainer) widget;
- Heading (Cristy Dowson) and Button (About Me) widgets.
To edit the background image, use the following path:
Step 1 – Start editing the page with Elementor;
Step 2 – Click on “Edit Section”, and choose the “Style” tab;
Step 3 – You can edit the background image under the “Background” panel.
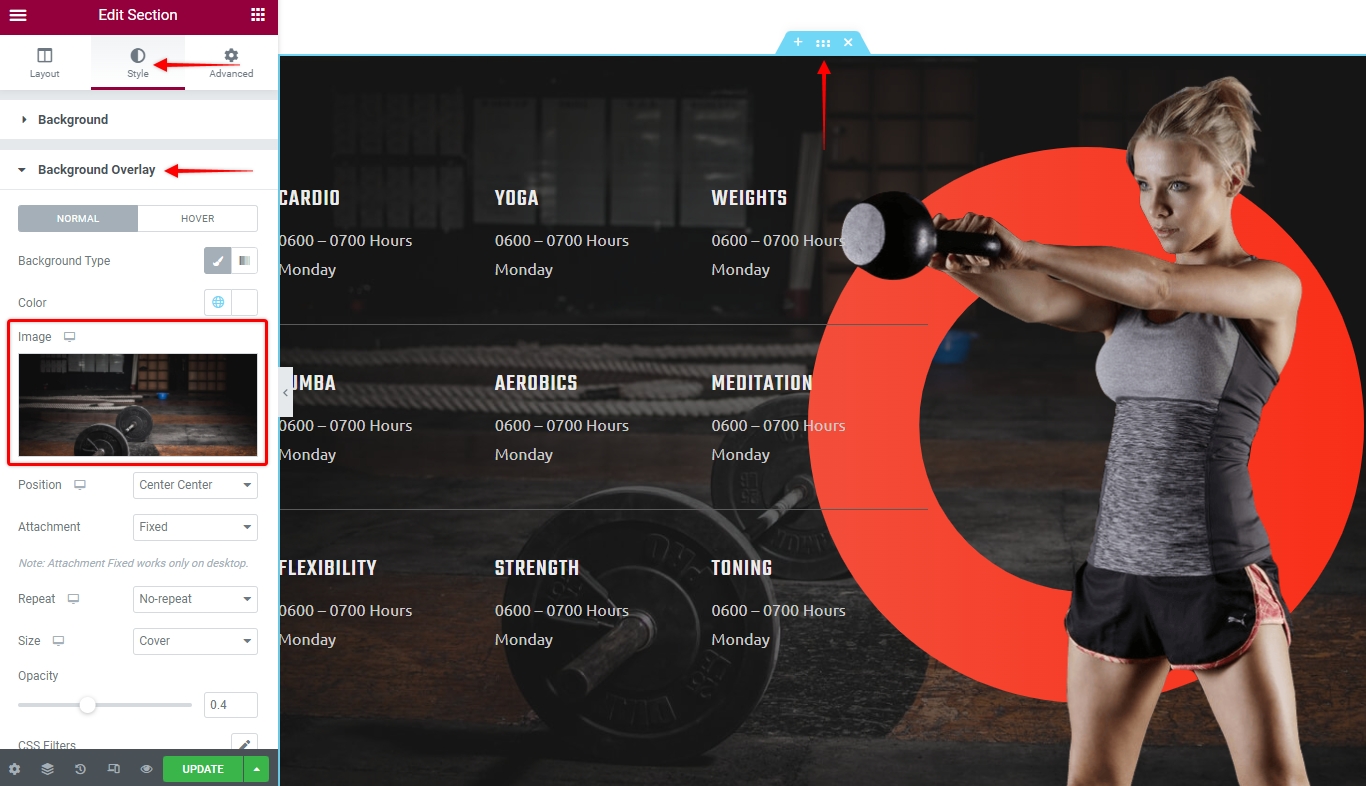
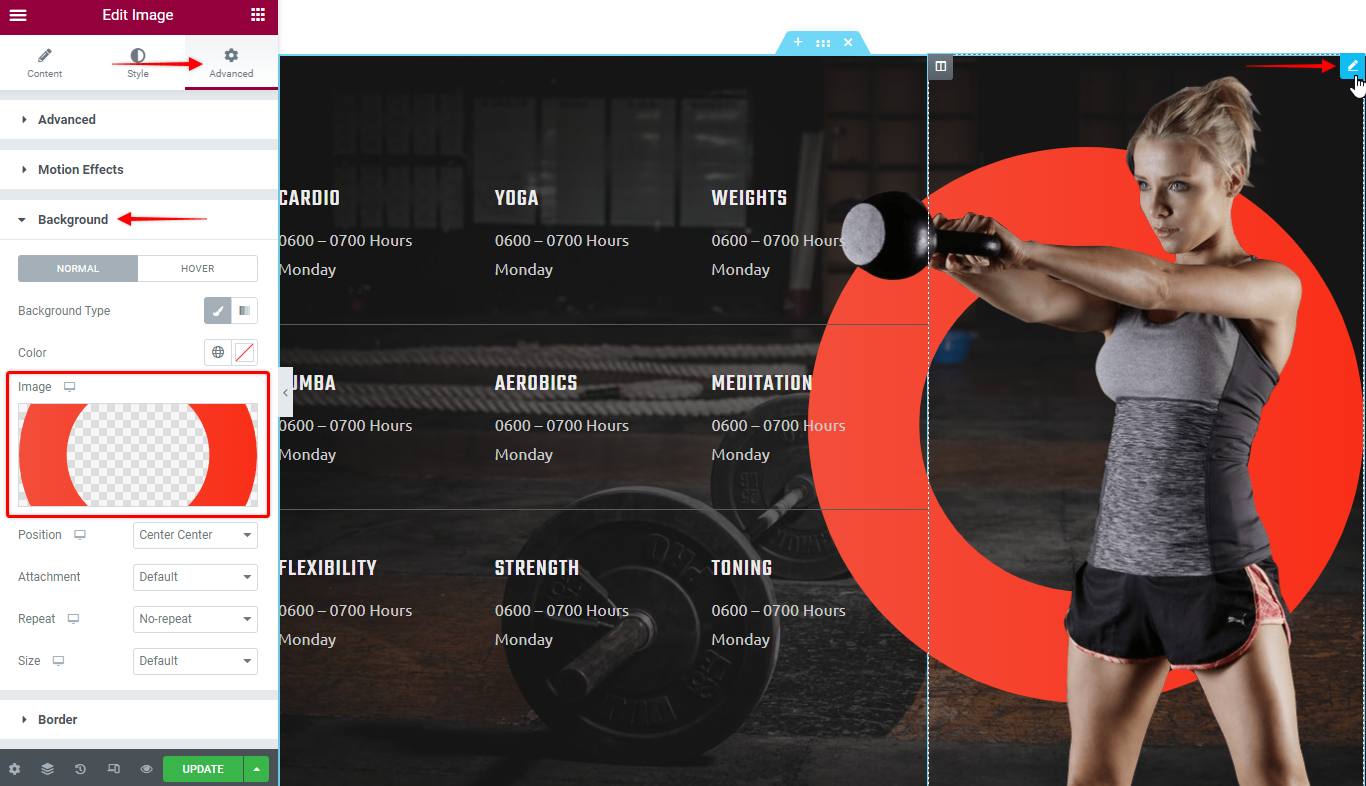
Example 2 – Section Background Overlay, Image and It’s Background
The second example contains images in several layers. This is the structure of the section:
- Section with the background overlay;
- Image widget with set background;
- Inner layers containing Heading and Text widgets.
Now, let’s see how you can edit images in this section:
Step 1 – Start editing the page with Elementor;
Step 2 – Here, click on “Edit Section”, and choose the “Style” tab;
Step 3 – You can edit the background overlay image under the “Background Overlay” panel.
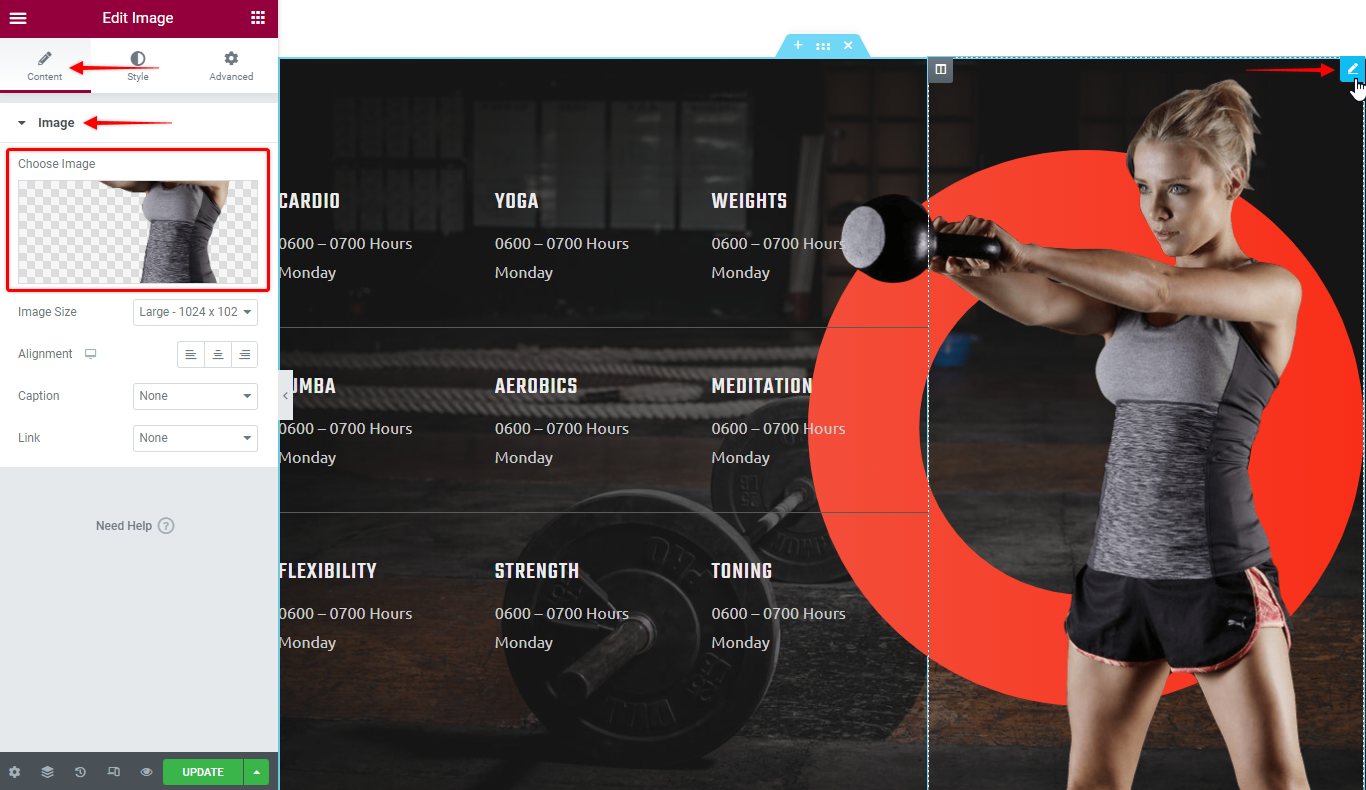
Step 5 – Similarly to the section background, you can edit the Image Widget “Background”. To do this, switch to the “Advanced” tab and scroll down to the “Background” panel:
In short, your design options are almost endless. If you’re unsure how to edit any image, just carefully examine all layers until you find the needed settings.
Other Plugins and Starter Templates
Finally, our designers sometimes use additional plugins, so check your “Installed Plugins” to be sure. These plugins will be installed on your website when you import a template.
Further, keep in mind that this will happen only if you import the whole website. Thus, if you imported a single page, you would need to add plugins and dynamic content yourself.
Elementor Header & Footer Builder Plugin
The Elementor Header & Footer Builder is a great free plugin. It allows you to add separate elementor-designed blocks anywhere on your website. This way, the same section can be added to multiple places on your website. For example, some Starter Templates have subscription sections built using this plugin.
Thus, check your installed plugins for Elementor Header & Footer Builder when you import a complete site. If this plugin is present, all templates created with it will be located at Dashboard > Appearance > Elementor Header & Footer Builder.
To edit these templates, please follow these steps:
Step 1 – Navigate to Dashboard > Appearance > Elementor Header & Footer Builder and find the template you wish to edit;
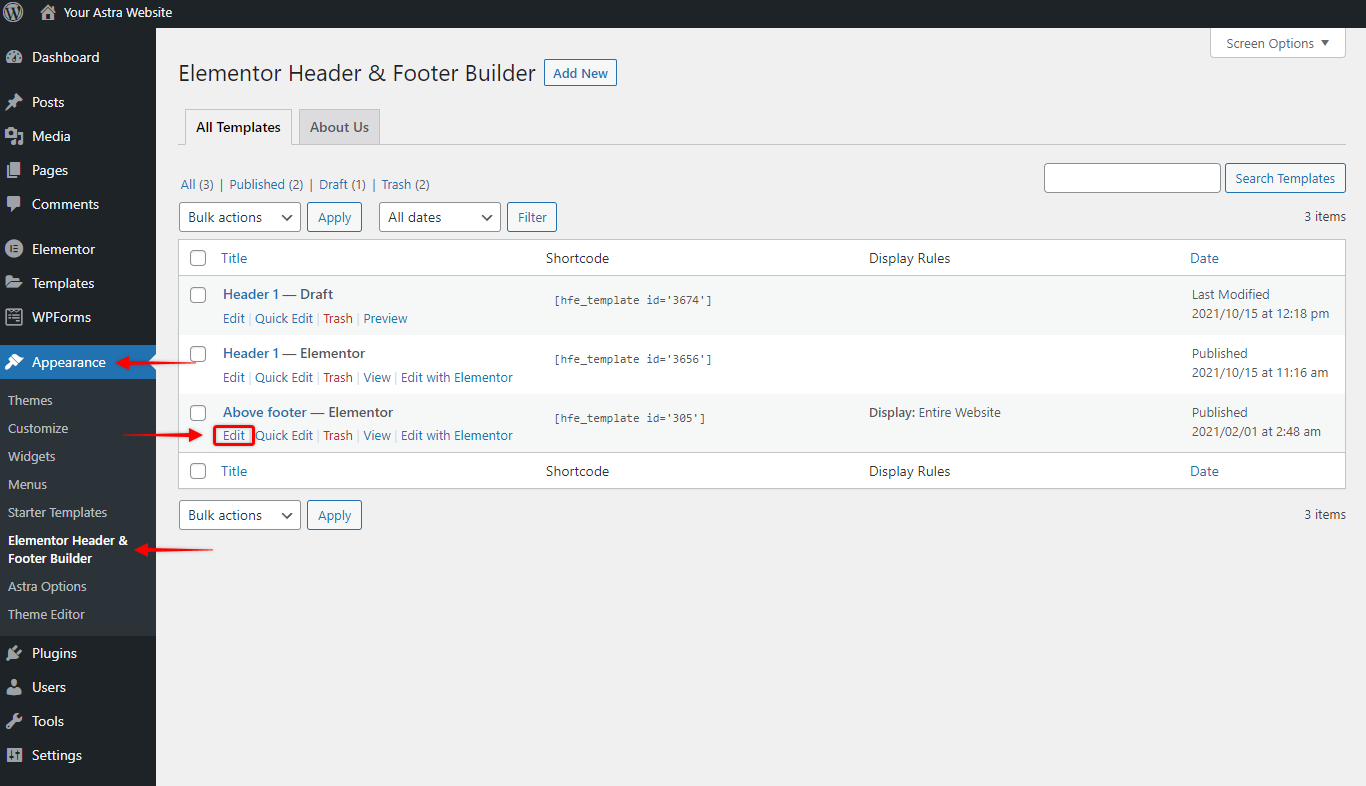
Step 2 – Find the “Edit” option under the template name, and click on it to start editing;
Step 3 – Further, click on the “Edit with Elementor” button to open the Elementor editor;
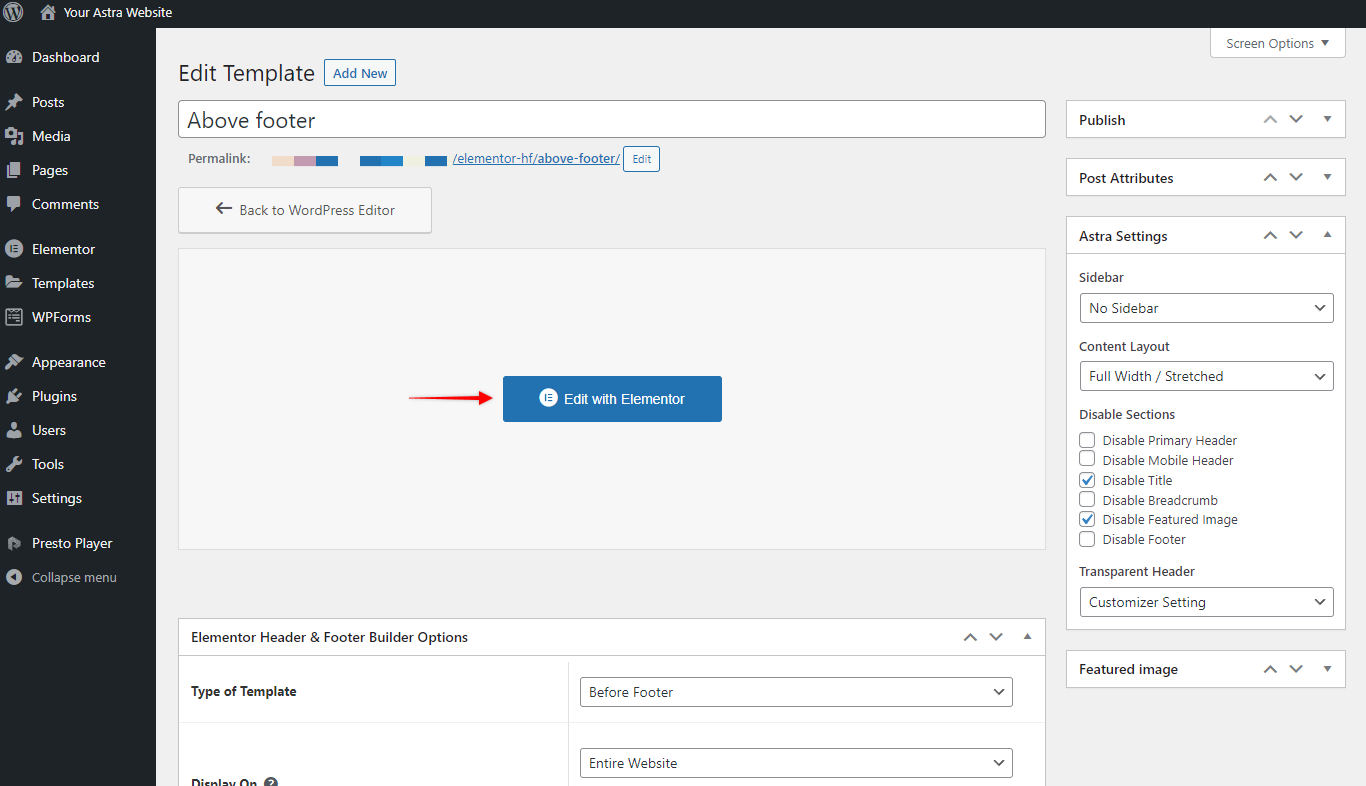
Step 4 – Make modifications you need and click on the “Update” button. Next, click on the Elementor menu and “Exit to Dashboard” to return to template editor;
Step 5 – Also, if needed, you can update Elementor Header & Footer Options. Here, you can change the Type of Template, change the location (Display On), and limit specific User Roles.

Step 6 – Update the template to apply changes.
If you wish to remove any block, you can simply delete it or change the “Display on” settings.
In conclusion, you should now be equipped to build your website with Starter Templates without any hustle. Of course, if you still need help with any template designs, feel free to contact our Support Team.
