
While Astra provides a wide range of Google fonts, you can also use your own custom fonts easily.
This document will help you understand how to add custom fonts while using the Astra theme.

What are Custom Fonts
Custom Fonts are special letter styles you can pick for your website instead of the usual ones everyone uses. They let you give your site a unique look and feel.
These fonts are unique and distinct, often reflecting the personality, branding, or design preferences of the entity they are created for.
For instance, if you have a fancy clothing brand, you can choose a special font that looks elegant and exclusive. This makes your brand stand out and gives your website a classy vibe.
Or, if you run a creative agency, you can go for a fun and different font that matches your creative style, making your site look cool and memorable.
Thus, Custom Fonts help your website look special and fit your brand or style better.
How to add Custom Fonts in Astra
To use your own custom fonts, you have to install the custom fonts plugin to your website first. Then download the custom fonts of your choice, and lastly upload and use custom fonts to your website.
Let us go through each step one by one.
Firstly, you can simply follow the below steps to add and use the Custom Fonts plugin on your website:
- Go to your WordPress Dashboard.
- Click on “Plugins” in the menu and select “Add New.”
- Search for “Custom Fonts” in the search bar.
- Click “Install” and then “Activate.”
- After installing, activate the Custom Fonts plugin.
- Find the plugin options at Dashboard > Appearance > Custom Fonts to customize your fonts.
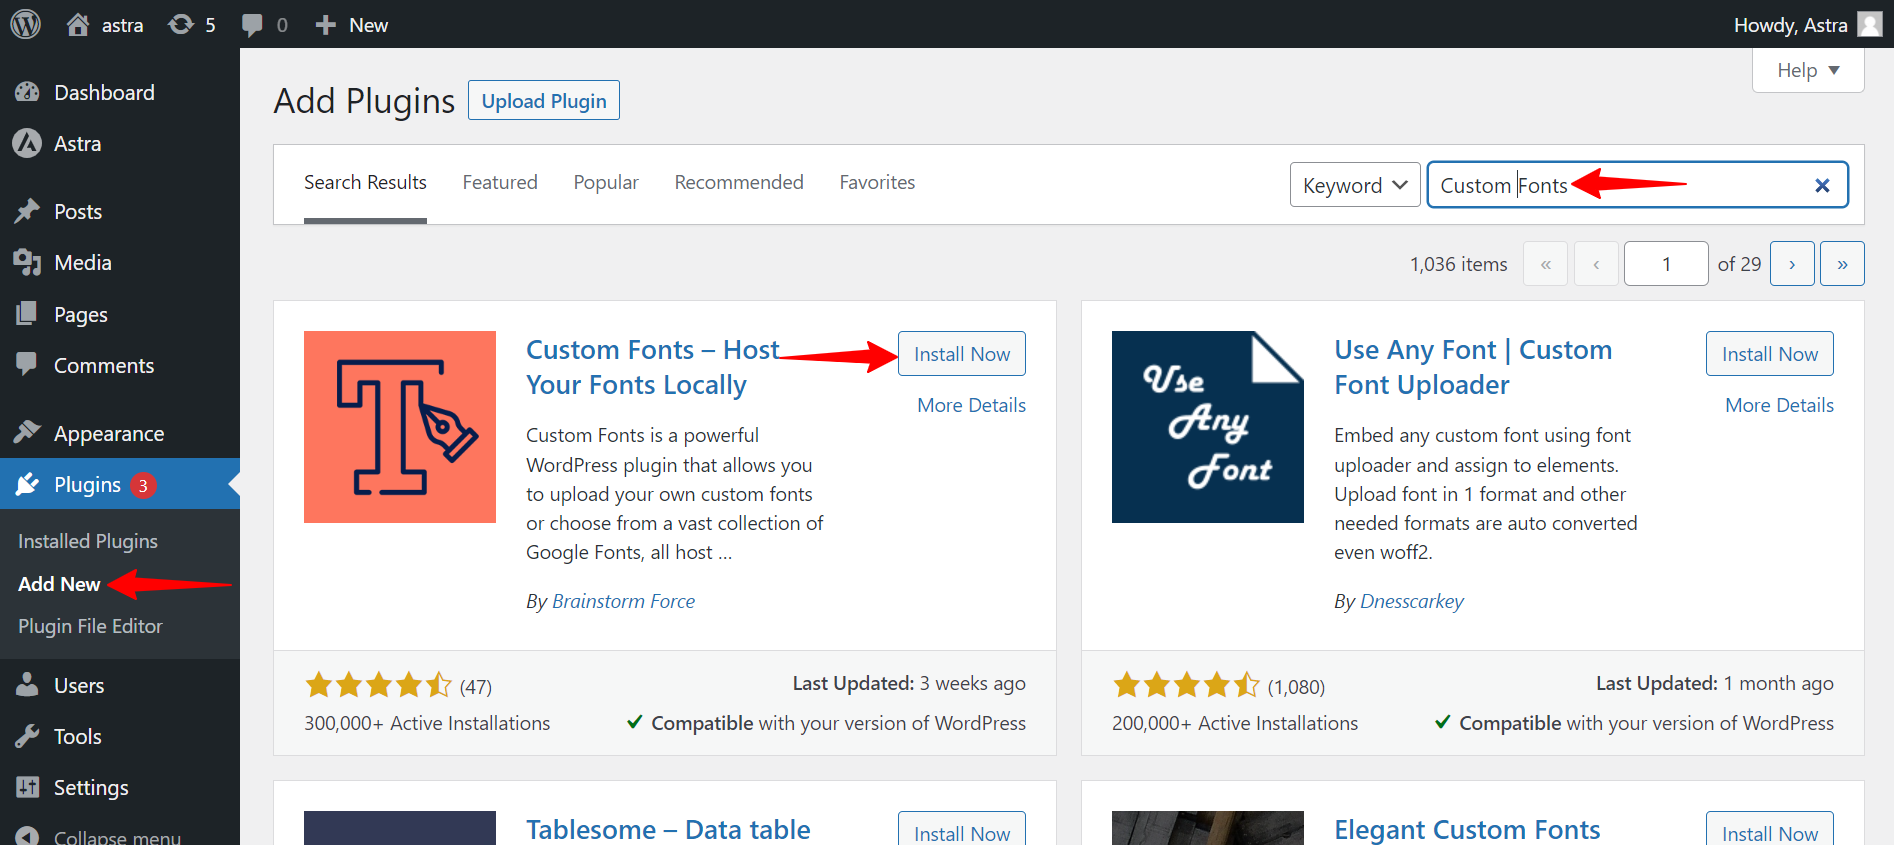
That’s it! you’ve successfully added and activated the Custom Fonts plugin and can now customize fonts on your website.
The next step would be downloading the custom font.
How to Download the Custom Font
Before adding fonts to your website, you can get your custom fonts from various sources. It’s important to be aware that some fonts may come with licensing restrictions when you incorporate them into your website.
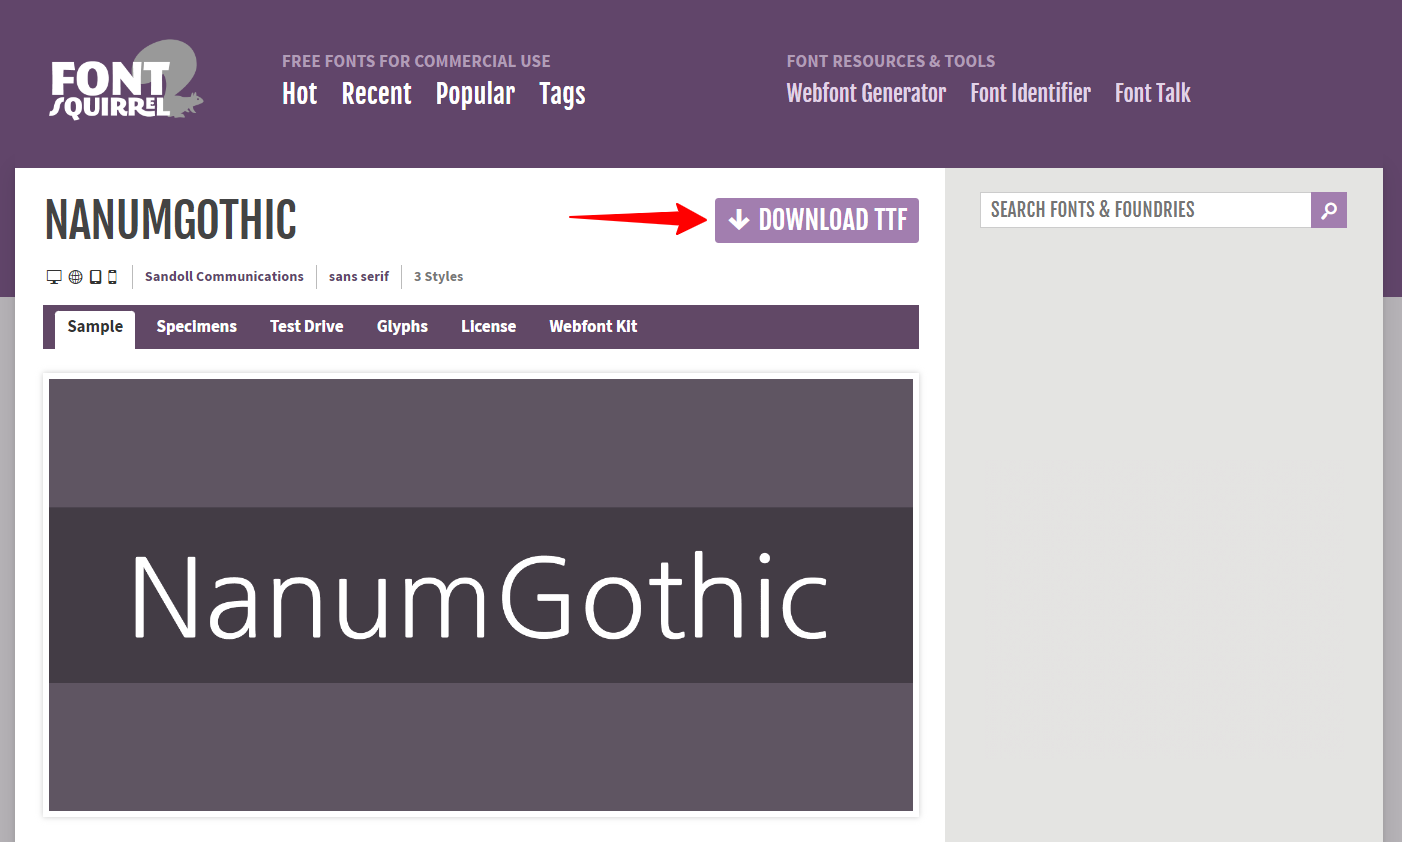
For the purposes of this guide, we will use Google Fonts as an example. You can access Google Fonts at https://www.fontsquirrel.com/.
Once you’ve chosen your fonts from Google Fonts, the next step is to download the font files by clicking the “Download TTF” button.
When you open the downloaded .zip file, you’ll find font files in various formats like TTF, OTF, WOFF, WOFF2, and more.
These font files can then be extracted and saved to your computer. Depending on your needs, you can later upload one or several of these font files to your website as required.
Upload and Use Custom Font on Your Website
Once you have your font files and Custom Fonts plugin installed it’s time to upload this font. Let’s start:
- Navigate to Dashboard > Appearance > Custom Fonts;
- Now, click the ‘Add New Font‘ button, Give your font a name. This can be any name you want that will be recognizable to you. This is how the font will show in the font list in the Customizer. For this example, we will keep the name of the font – “Nanum Gothic”.
- Select the appropriate Font weight for the font file you’re uploading.
- Select your font file.
- This step is optional. If your font has more variations, scroll down and click on “Add Font Variation”.
- Once you have added all font variations, click on the “Save Font” button at the bottom of the form to save and upload it.
- The font will be automatically added to the font list for all Customizer typography options.
How to Customize Typography With Your Uploaded Font
Once you upload the custom font to your website, the font will be automatically added to the font list for all Customizer typography options. To use it, please follow these steps:
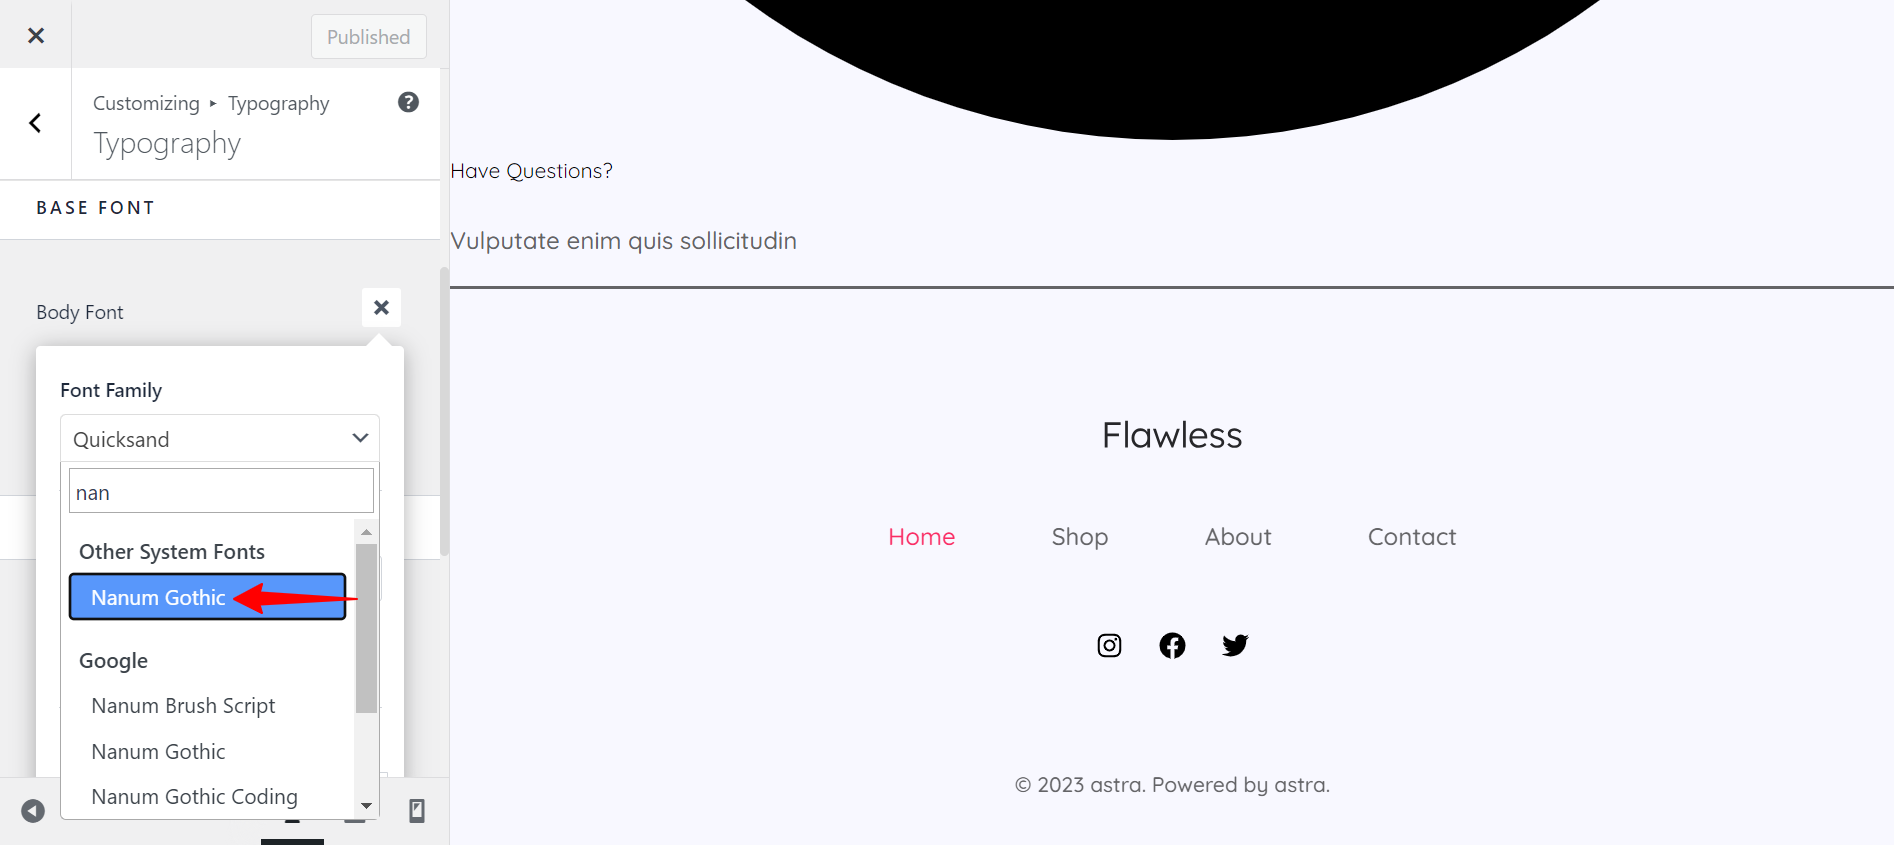
- Navigate to Appearance > Customize
- Navigate to any Typography option you wish to edit. For this example, we will use the uploaded font at Global > Typography > Base Font
- When you click on the font dropdown, you will find your new font under the “Other System Fonts” section in the list. Select your font here.
- Set the variants you want to use from the available variants (depending on how many you uploaded).
- Click the ‘Publish’ button to apply your font.
By following the steps above, you can add any custom font to your site and use them with the Astra theme.
Hope this was helpful. But if you have any questions, don’t hesitate to reach out to us.
Note:
It’s important to mention that since Astra theme version 3.6.0, you have the option of self-hosting Google Fonts on your website (Astra > Dashboard > Settings > Performance > Load Google Fonts Locally). Thus, there is no need to import Google Fonts using the Custom Fonts plugin. You can use this plugin for the fonts downloaded from other sources.


