
Adding images to your WordPress menu items can enhance the user experience and make your website more visually appealing. However, not all WordPress themes come with built-in options to add images to menus. That’s where the Menu Image plugin comes in handy.
It allows you to easily add images to your menu items and customize their appearance. In this article, we will show you how to use the Menu Image plugin to add images to your WordPress menu items using the Astra theme. By following these step-by-step instructions, you’ll be able to create a more engaging and attractive website for your visitors. Let’s get started!
Step 1: Download the Menu Image plugin and Install it on your Website
You can easily download the Menu Image plugin from here. Once you have downloaded the plugin, navigate to your WordPress dashboard, click on the Plugins, and Add New. Click on Upload New Plugin and upload the ZIP file and click on Install. Once the plugin is installed, click on Activate to activate the plugin.
Step 2: Settings
Navigate to the plugin settings by clicking the Menu Image option.
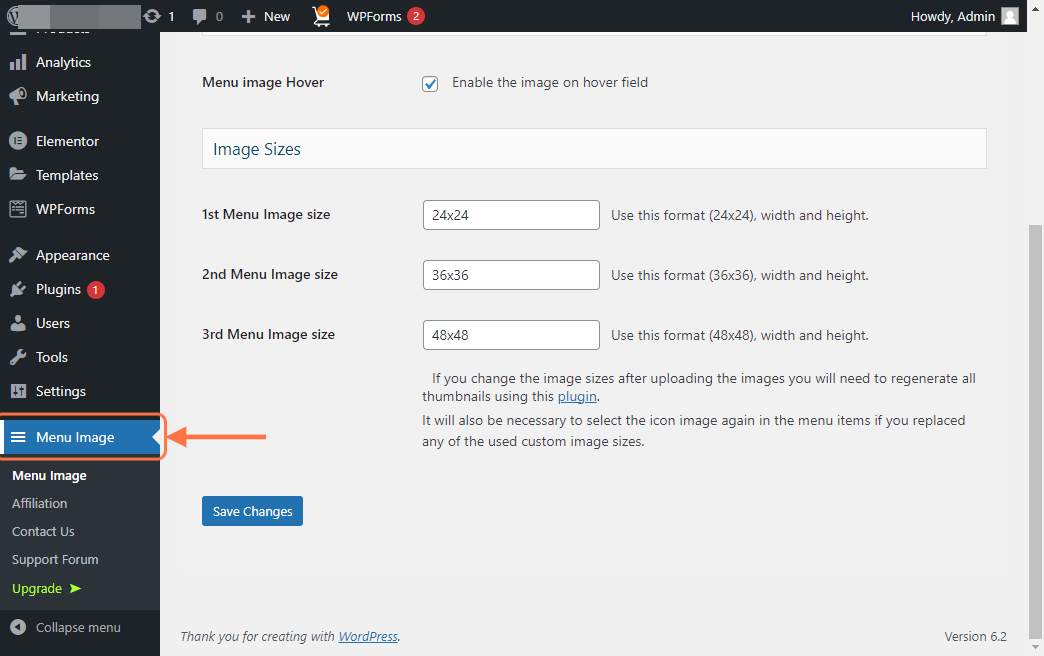
Image Sizes
Upon accessing the plugin’s settings, you will be presented with a range of sizing options for the image icons. In case you opt for icons from Font Awesome or Dashicons, Menu Image will take care of resizing them automatically.
However, if you choose to utilize images from your media library, you will need to manually select the desired size. The plugin caters to the standard image sizes provided by WordPress, including thumbnail, image, and large. Additionally, it includes three distinctive sizes set by default to 24×24, 36×36, and 48×48 pixels.
Menu Image Hover
It’s important to note that this particular setting is solely applicable when using custom images. In case you intend to utilize dash icons or Font Awesome icons, there is no need to concern yourself with the ‘image on hover’ functionality.
Incorporating a distinct icon can assist users in identifying their current position in the navigation menu. This is especially beneficial when the menu comprises a multitude of items. To illustrate, you can employ diverse colors or icon sizes to emphasize the presently-selected menu item.
If you wish to experiment with various hover effects, don’t forget to enable the ‘Enable the image on hover field’ option.

Save Changes
Once you are done choosing the size and menu image hover option, please don’t forget to save the changes at the bottom of the page.

Step 3: Adding the images to the Navigation Menu
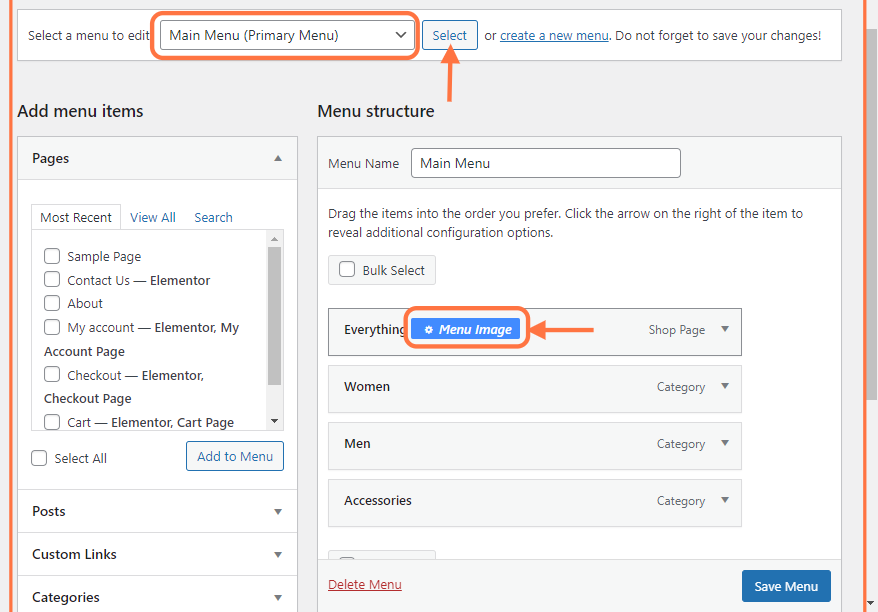
- Navigate to Appearance > Menus from the WordPress dashboard.
- Create a new menu or select an existing one.

- Select the menu from the drop-down that you would like to add images to
- Click on Select to select the menu
- Click on the Menu Image button to choose the image
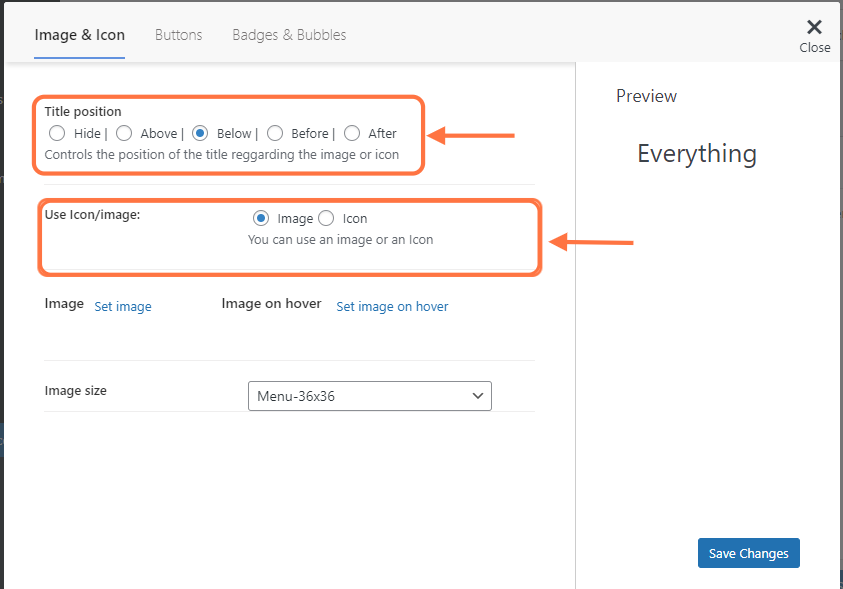
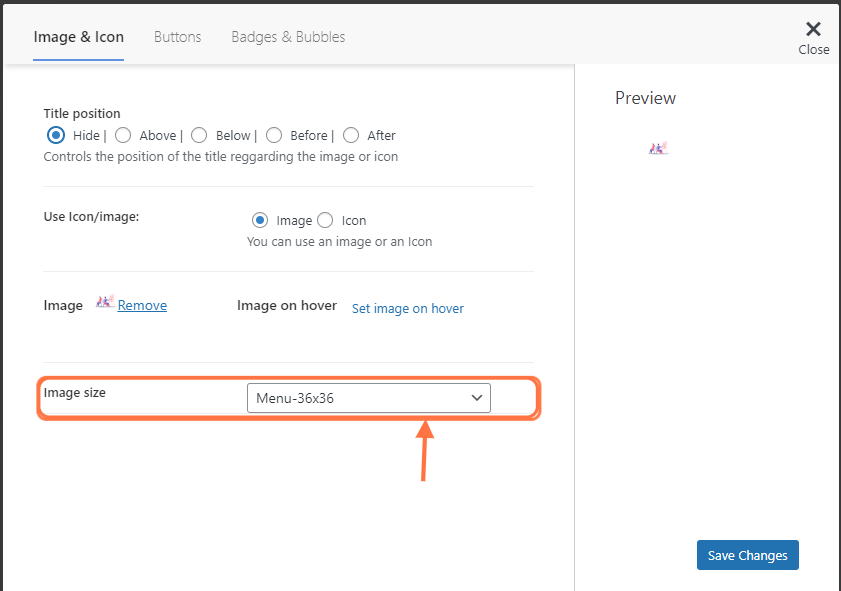
- Choose the position of the image
- Choose whether you would like to add an image or an icon
- Click on the set image button to choose the image from your media file
- You can also choose an image for the menu when it is being hovered over
- If you would like to just show the images instead of the Title, choose Hide in the Title Position
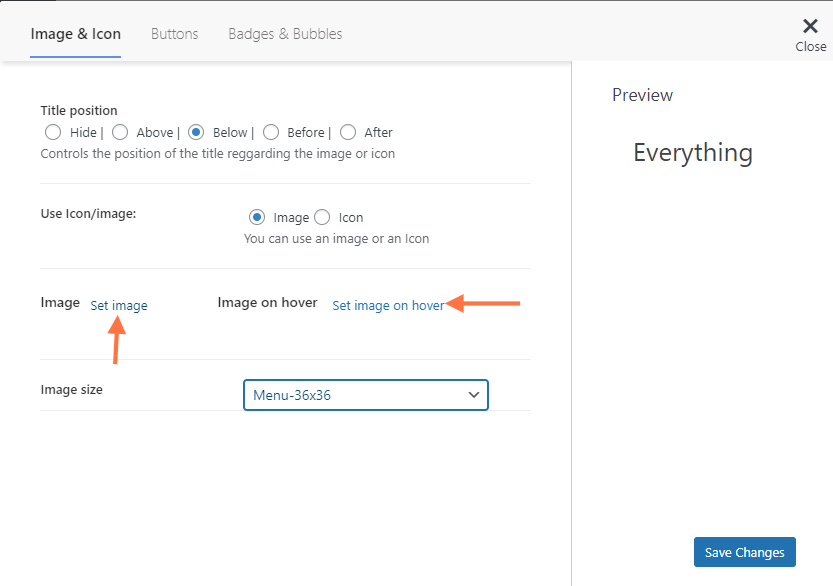
In the next step choose the image size and click on Save Changes to make this permanent.
Here is how it is going to look at the front end of your website:

Tips and Tricks
Here are some additional tips to keep in mind when using the Menu Image plugin:
- Make sure the images you use are of the appropriate size and aspect ratio for your menu. Images that are too large or too small can look distorted or pixelated.
- Consider using images that are relevant to the menu item they represent. This can help users quickly identify the content they’re looking for.
- If you’re using the Astra theme, you can further customize the appearance of your menu items using the theme’s built-in options or with custom CSS.
Summing It Up
In conclusion, adding images to your WordPress menu items using the Menu Image plugin can significantly enhance the user experience and make your website more visually engaging. By following the steps outlined in this article, you can easily add custom images to your menu items and adjust their appearance using the Astra theme’s built-in options or with custom CSS.
Remember to choose images that are appropriate in size and aspect ratio for your menu, and consider using relevant images that can help users quickly identify the content they’re looking for. With these tips and tricks in mind, you can create an impressive and user-friendly menu that will keep your visitors coming back for more.
