
Are you a whiz in the kitchen? Do you have all the best recipes handed down from your grandmother? Or maybe you just like to experiment and come up with your own unique dishes and want to share those recipes with the world?
Whatever your cooking skills are, if you’re passionate about food, you may be wondering how to start a recipe website.
The good news is that you can easily create a recipe website using WordPress.
In this post, we’ll show you how to create one in under an hour.
You can have your site up and running in no time. We’ll even give you some tips on how to make it stand out from the rest.
By the end of this how-to tutorial, you’ll be able to create a recipe website like this.
So, what are you waiting for?
Let’s get started!
How to create a recipe website in 5 simple steps
Creating a recipe website is very easy. We’ve shared 5 steps to make your recipe or food blog website. You don’t need any prior coding knowledge and don’t need to know much about how websites work.
Just follow the below steps to get the job done.
The below steps are to create a recipe website:
- Step 1: Set up the prerequisites for a WordPress website
- Step 2: Install and activate a theme
- Step 3: Install and activate Starter Templates
- Step 4: Select a recipe website template
- Step 5: Customize your website
Let’s get started.
Step 1: Set up the prerequisites for a WordPress website
Before you start building a website, there are a few things you’ll need.
- Select a suitable domain name
- Buy a hosting plan
- Install WordPress
Let’s briefly discuss each of these.
Select a suitable domain name
A domain name is the first prerequisite for your website. A domain is the name of your website.
You can see our domain name ‘wpastra.com’.
Most hosting companies sell domain names. You can buy a domain from any hosting provider.
Learn everything you need to know about domain names with our guide.
Buy a hosting plan
Website hosting is another essential element you need before launching your website. It works like your computer storage. Store your website files on your web host to make your website available on the web.
You can buy a suitable hosting plan from any reputed hosting providers like Kinsta, SiteGround and Cloudways.
Note:
Cloudways is offering a special deal for customers. If you buy a hosting plan, they’ll give you Astra Pro as a bonus, free for the first year.
Install WordPress
Now it’s time to install WordPress. WordPress is the world’s most popular content management system (CMS). It’s free, easy to use and has tons of free resources available
We recommend using WordPress to create your recipe website. It’s free, easy to use and provides unlimited potential for expressing yourself.
Most hosting providers will install WordPress for you. But if you want to do it yourself, check out this article on how to install WordPress.
Step 2: Install and activate a theme
A WordPress theme provides the design of your website. Using a theme is the easiest, fastest way to build a website which is why we recommend using one.
Astra is our own WordPress theme. It’s a free, modern WordPress theme trusted by over 1.6 million users around the globe. With this theme, you can create any type of website, including a recipe website.
For this article, we’re going to use our Astra theme.
Let’s install it.
Go to Appearance > Themes.
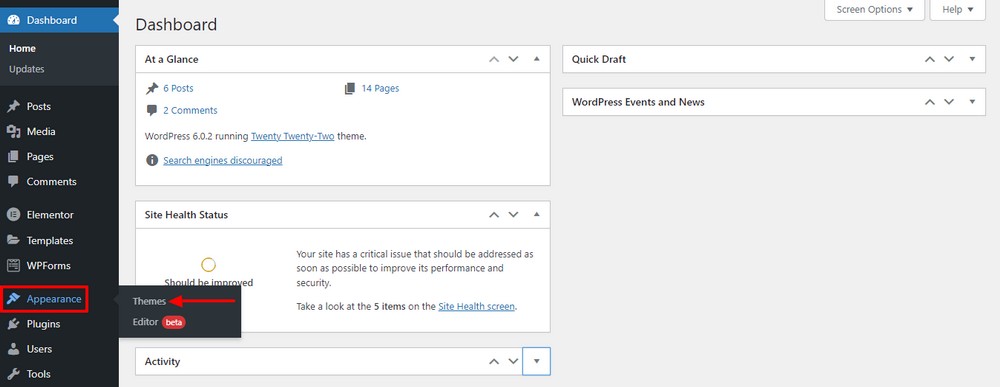
On the next screen, you’ll see the current activated theme on your website.
Click the Add New button.
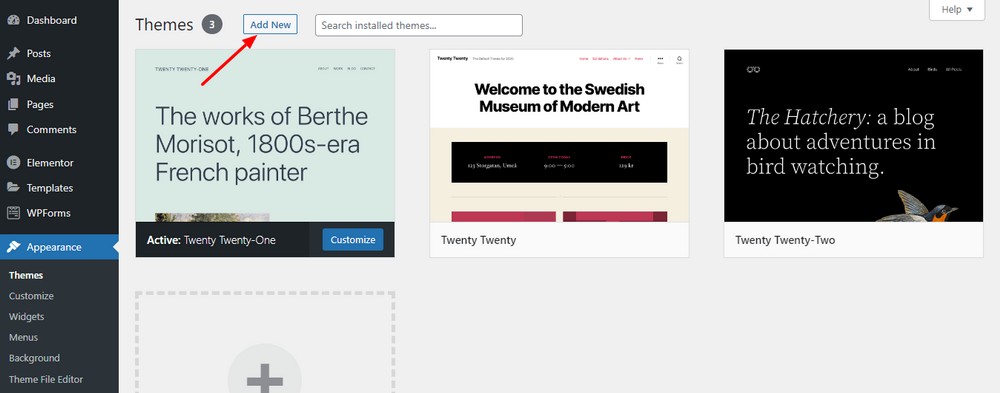
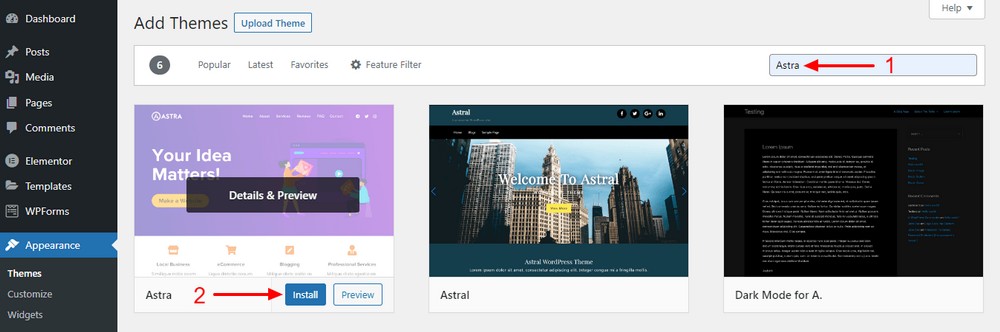
Type ‘Astra’ into the search bar on the right. Then hit the Install button.
Finally, click the Activate button.
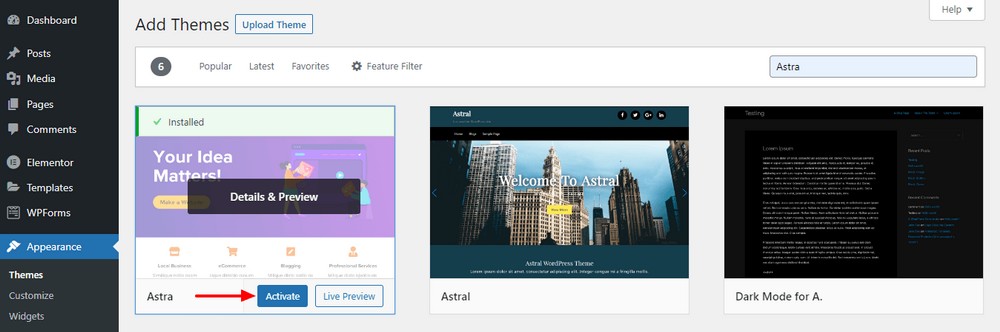
You’ve successfully installed and activated the Astra theme on your website!
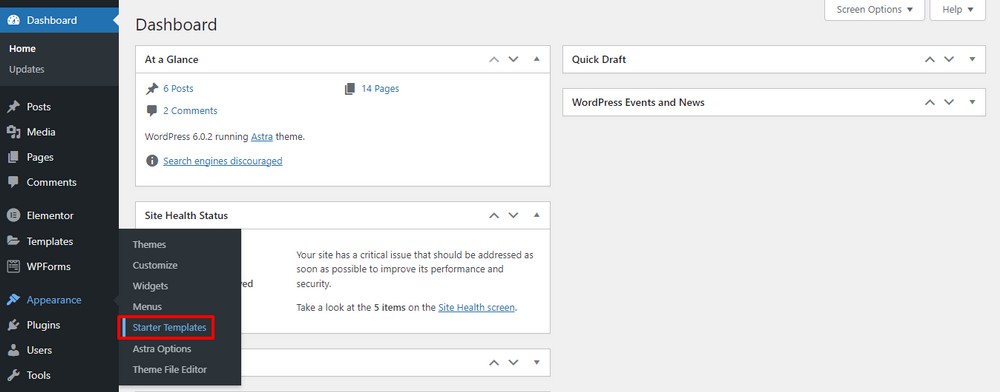
Step 3: Install and activate Starter Templates
Stater Templates is an easy to use website templates plugin. It’s compatible with popular page builder plugins like Elementor and Beaver Builder and the Gutenberg Block Editor.
It offers access to 230+ free and premium website templates.
There are several free and premium restaurant and recipe website templates to choose from. For this guide, we’re going to select a premium template to build our food blog website.
There are free food templates too, which we’ll highlight in a little while.
These advanced templates come with all the essential features that a food blog or recipe website should have.
Let’s install and activate the premium version of Stater Templates called ‘Astra Premium Sites’.
Once you’ve purchased the Astra Premium Sites, you will get the plugin ZIP file and a license key with the confirmation email.
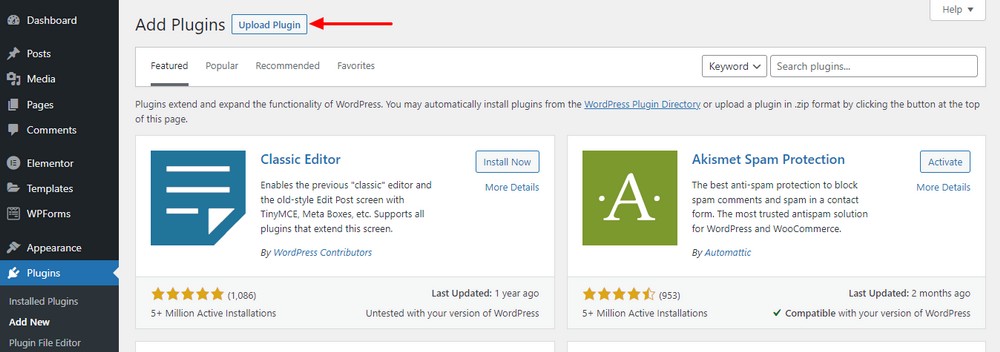
Navigate to the Plugins > Add New area.

Click on the Upload Plugin button.
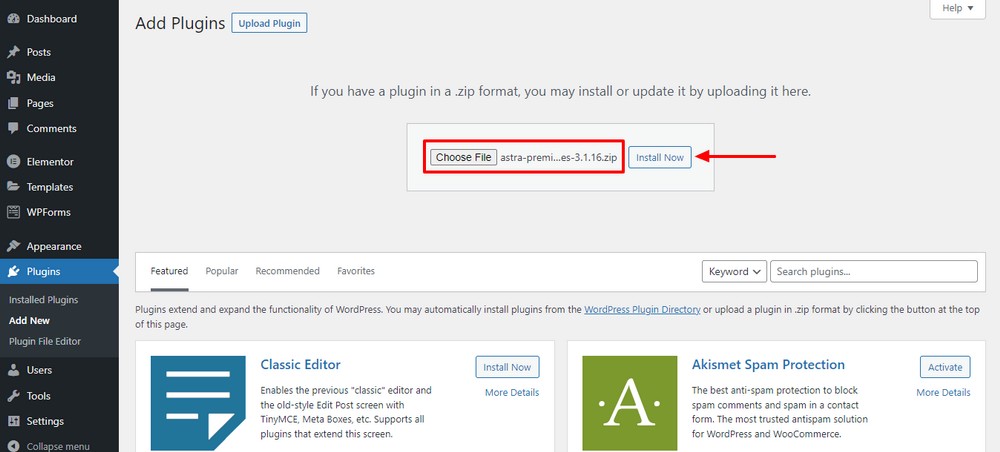
Choose the plugin ZIP file and hit the Install Now button.
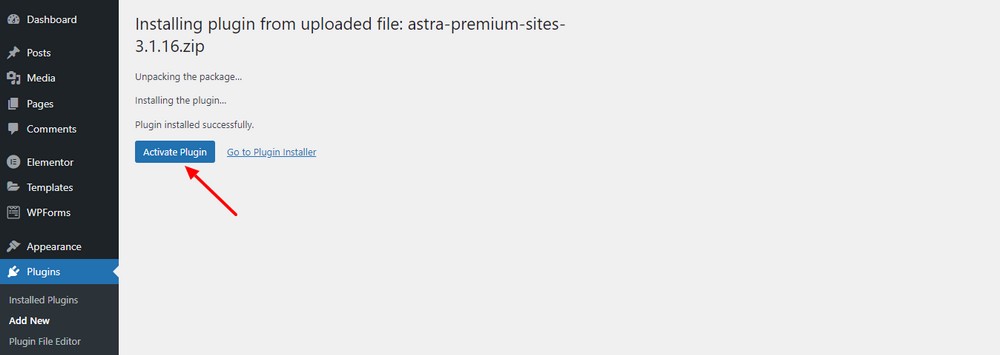
After completing plugin installation, click the Activate button.
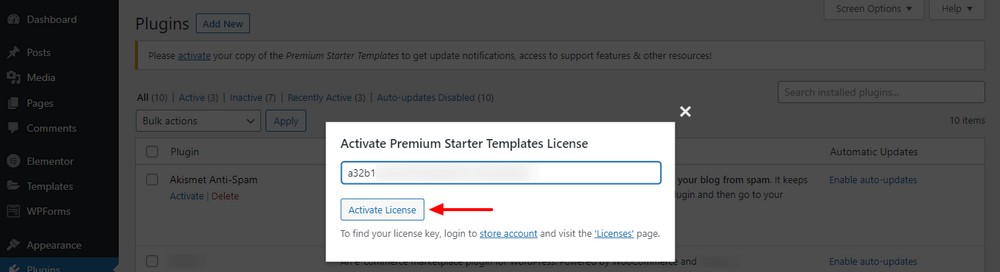
We’ll next need to activate the plugin’s license key to be able to use it.
Go to the Plugins > Installed Plugins area.
Find the Premium Starter Templates and click the License link.

Paste the license key into the input field of the popup modal.
Finally, hit the Activate License button to activate the plugin.
You should see a success message.
Note:
If you get an error message, you’ll need to contact our support team who will be happy to help.
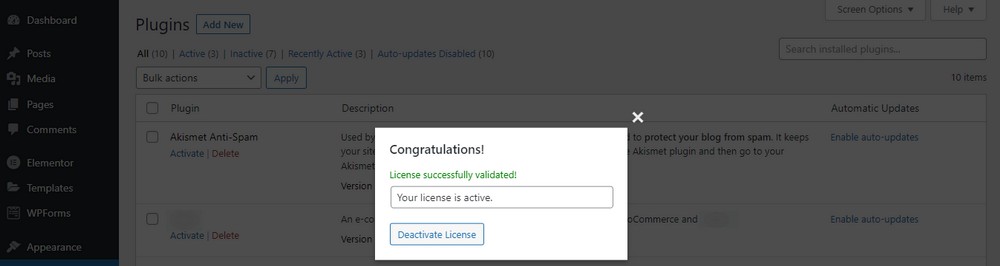
Congratulations! The license is activated successfully.
WordPress comes with many recipe plugins.
Check out the following two plugins:
Both offer a range of features that make them well worth checking out.
Step 4: Select a recipe website template
There are several recipe website templates that come with Starter Templates.
Food and Drinks Blog

Food and Drinks Blog is a clean, modern, responsive and multi page website template. This template is fully customizable and comes with all the essential features you need.
Key features:
- Header and footer section
- Grid blog layout
- Full width single blog page
- Custom about and contact page
- Multi page website layout
Food Blogger & Influencer
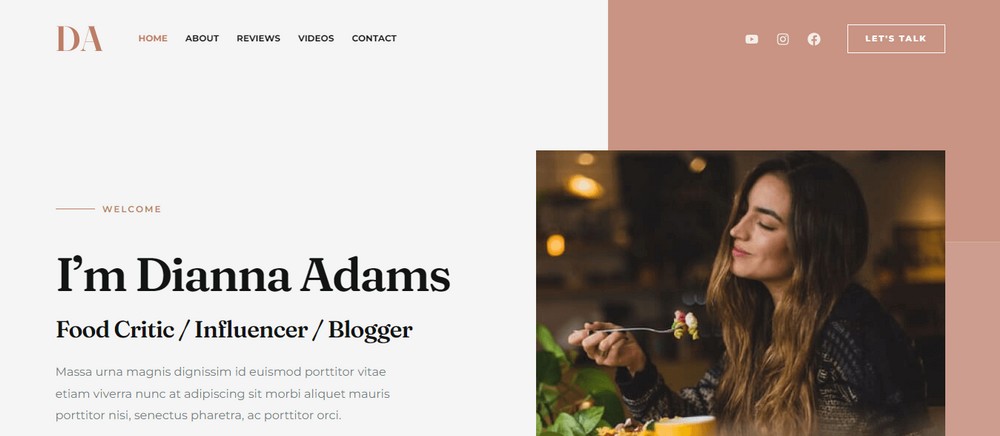
Food Blogger & Influencer is another hand crafted website template specially designed for food bloggers. This template is built with the Elementor page builder.
This amazing template has a stunning home page. You can display your latest food recipes and food blogging videos and do a whole lot more.
Key features:
- Navigation menu
- Video and review page
- Subscription form
- Logo section
- Social channels area
Recipe Blog
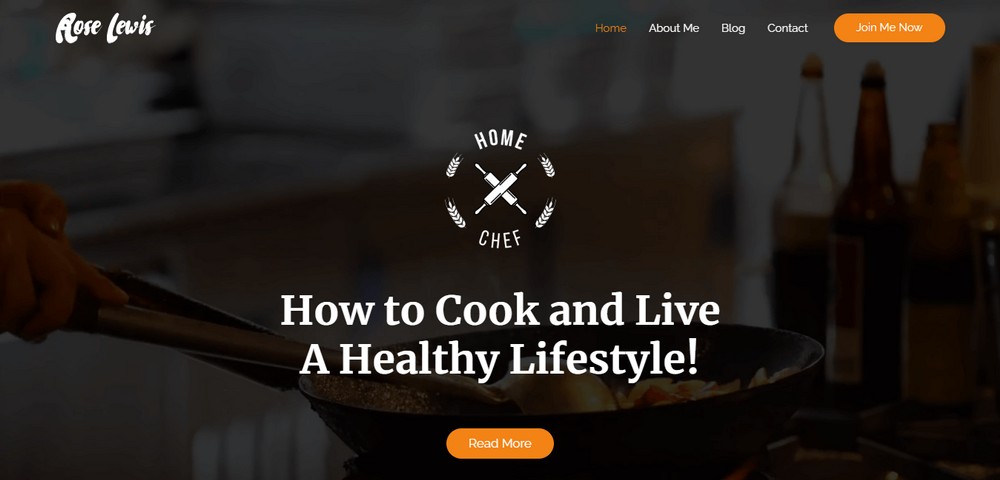
Recipe Blog is a well designed recipe website template built with Gutenberg blocks. It’s a multipage website layout and has a stunning hero section with a background video and a clean about section.
This free recipe website template comes with an elegant blog page. You can also share your reviews on the home to make a positive impression on your users.
Key features:
- Multi layered blog page
- Quote section
- Build in contact form
- Service area
- Catchy call to action (CTA) button
Food & Drinks Blogger
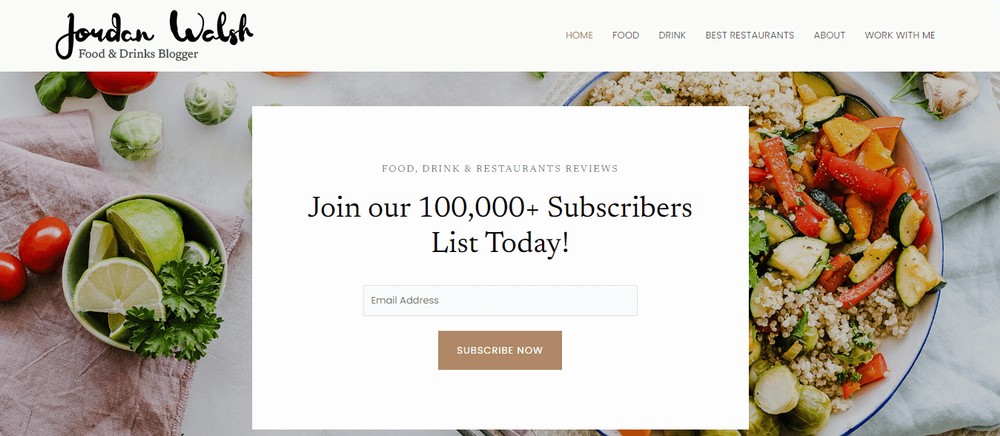
Food & Drinks Blogger is another outstanding website template for food bloggers who are looking to make a recipe website. This well crafted website template has an elegant header footer area and a simple subscription form on the hero section of the home page.
It allows you to show the latest recipe posts and blogging videos. Also, you are able to showcase the popular restaurants on the home page and customize the layout in your style.
Key features:
- Subscriber form
- Video and review section
- Footer menu
- Single post page
- About section
Other recommended starter templates:
- Video website templates
- Food and drinks website templates and designs
- Food ordering website templates
Let’s import a recipe website template and launch your website in a few clicks.
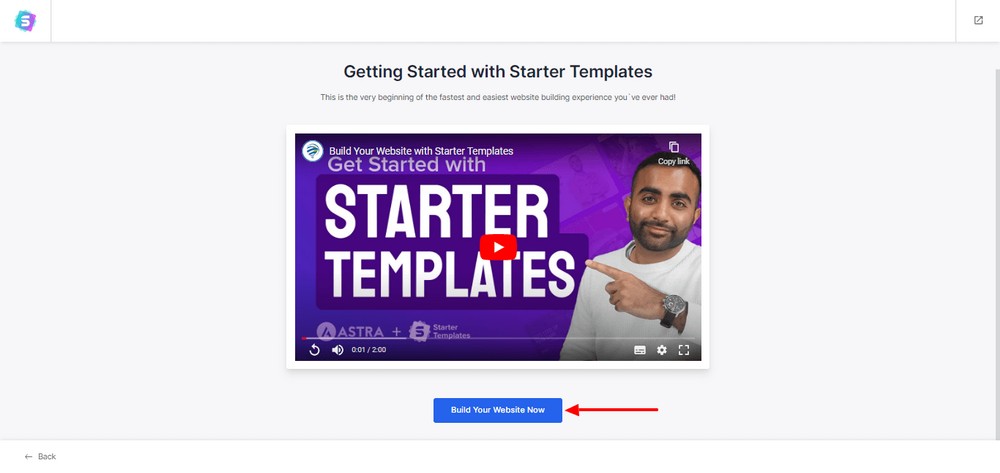
Go to the Appearance > Starter Templates section.
Click the Build Your Website Now button.
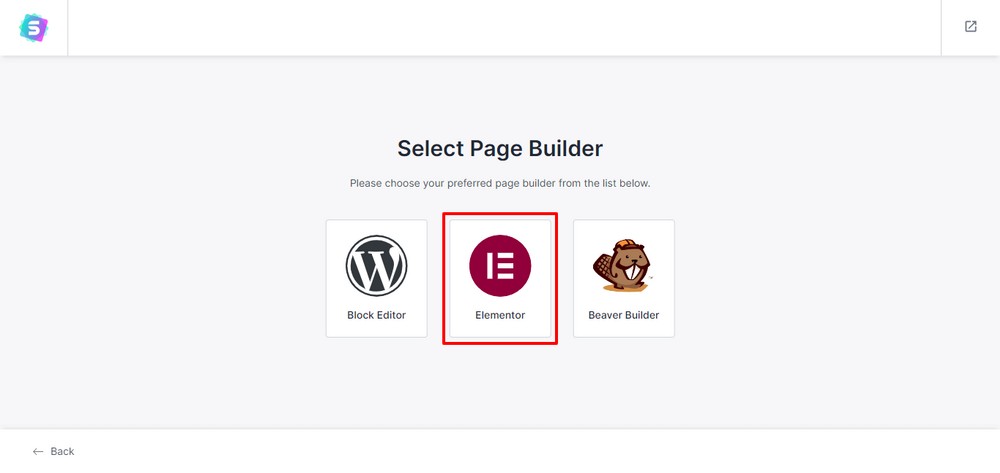
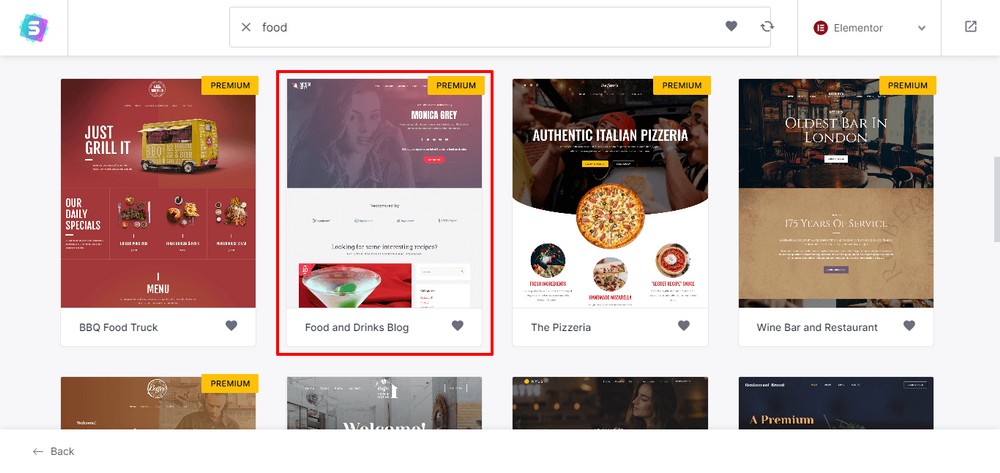
Select the page builder that you prefer. We’ve selected Elementor.
Next, we should find the right template. Type ‘food’ into the search bar.
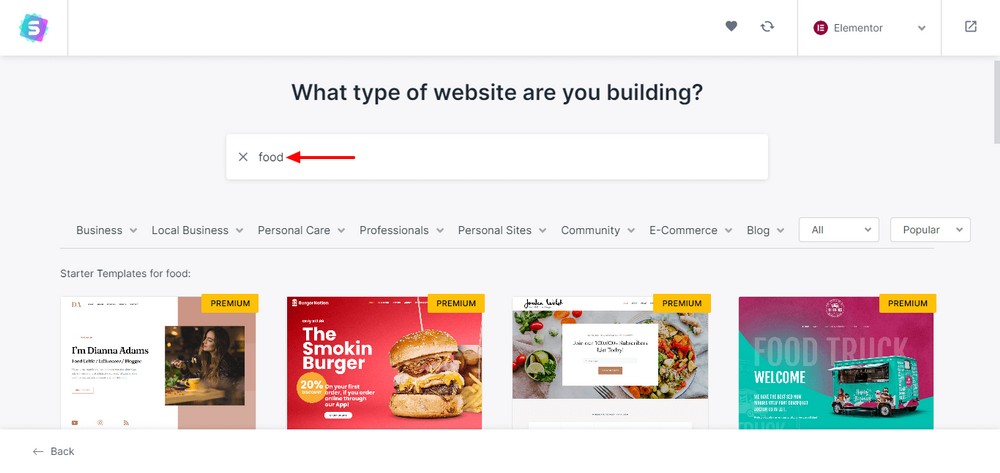
This will show you the templates which use the food tag. Then click on a template.
On the next page, you’ll get the option to add your website logo. If you don’t have one, you can add it later.
Hit the Skip & Continue button.
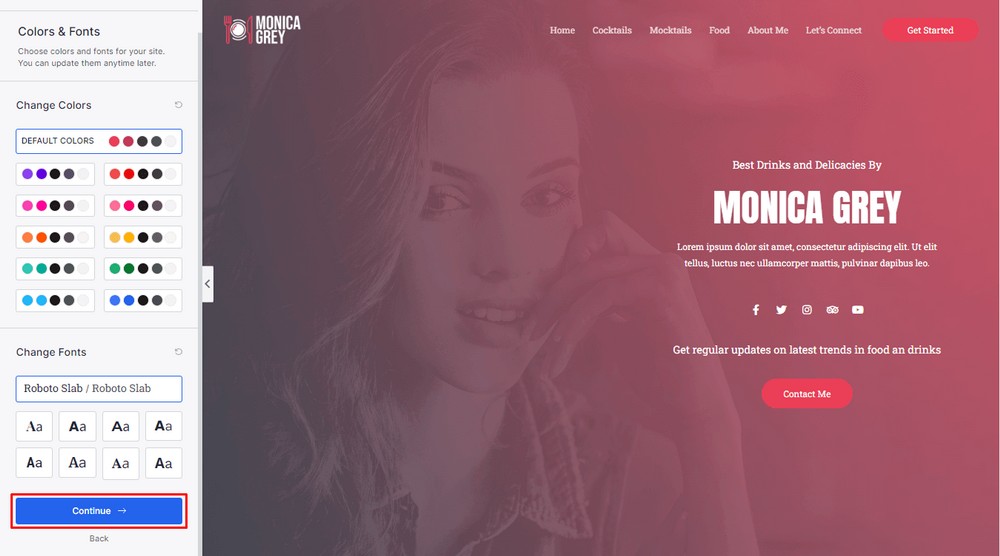
You can change the default website color and fonts on the next page. After that, click the Continue button.
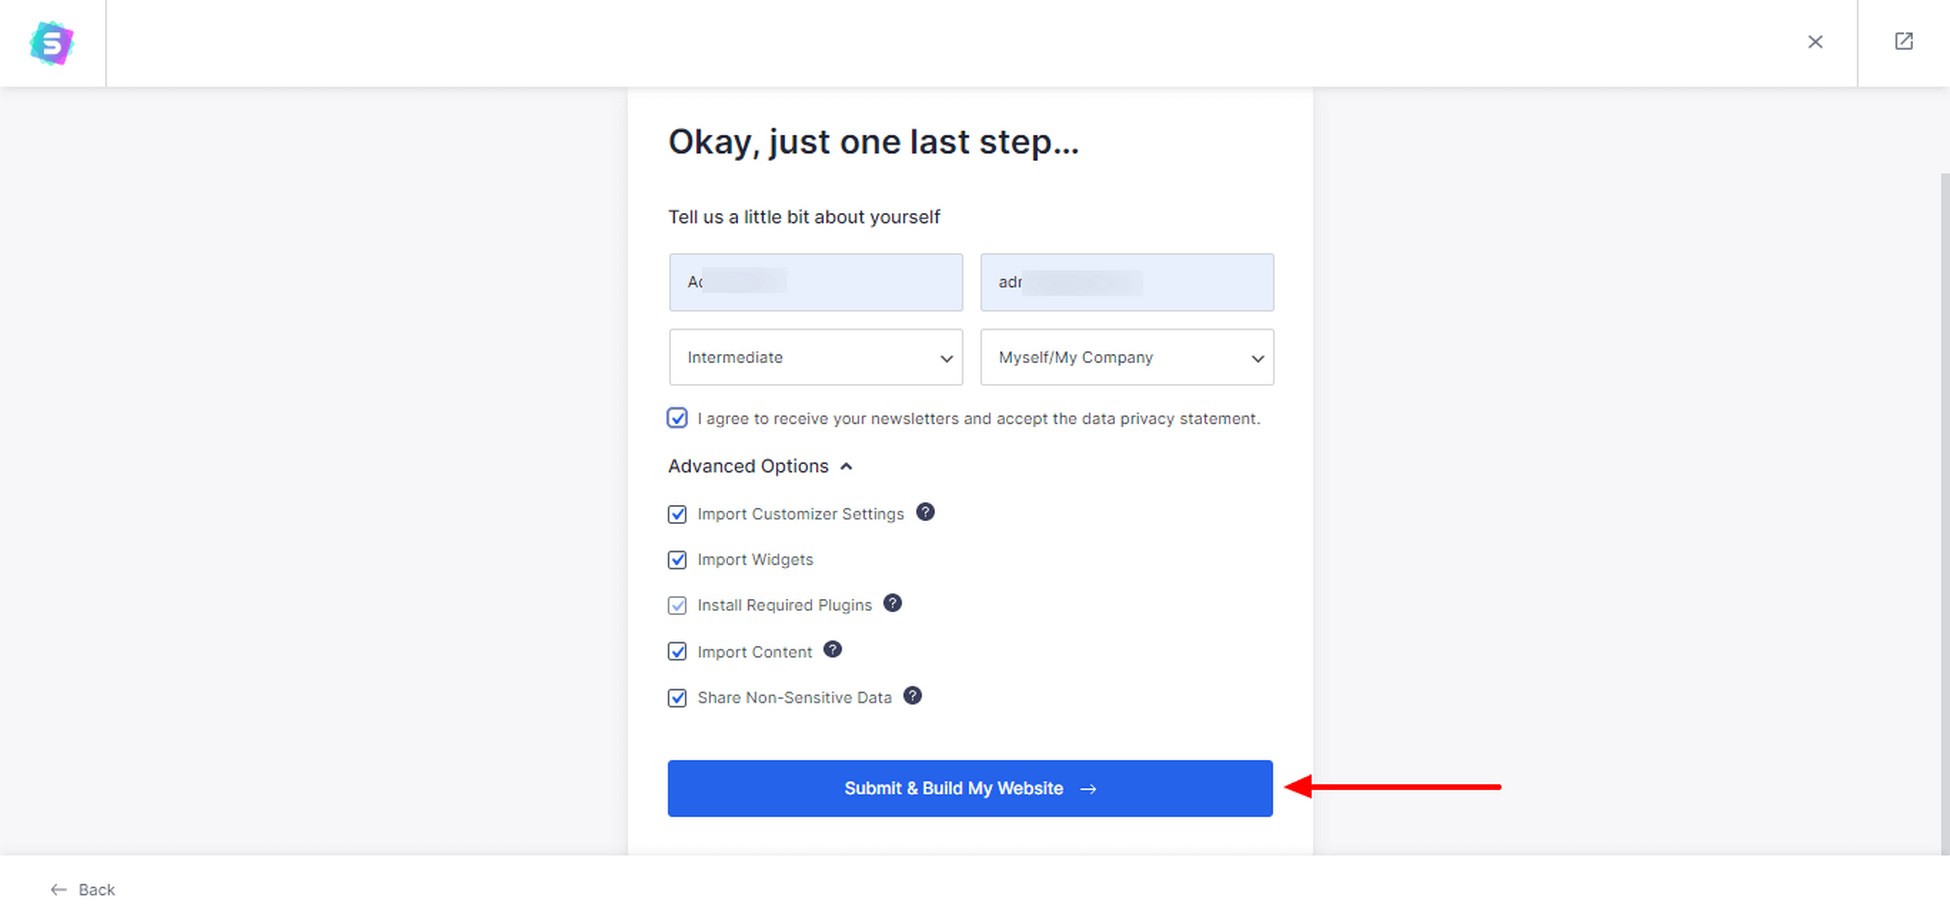
One more step to go.
If you want to subscribe to our newsletter, enter your details into the form.
Then hit the Submit & Build My Website button.
Now, the system will import the necessary files and required plugins to your website.

Congrats! You’ve successfully imported the template to your website.
Press the View Your Website button to see the current look of your website.
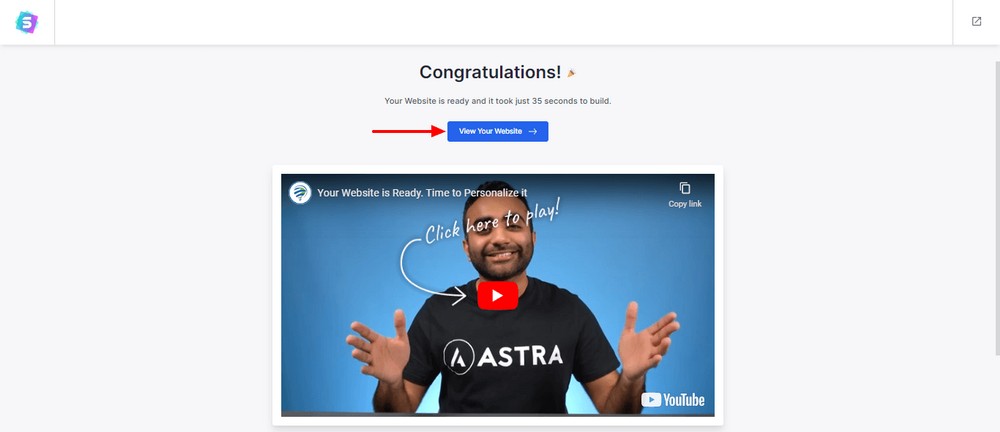
Check the following video. If you use the same template then your website will look the same.
Step 5: Customize your website
For making the recipe website more unique or to better reflect your brand, you can customize it.
We’ll now show you how to:
- Customize your homepage
- Add recipe image
- Import a portfolio block
- Add a newsletter form to the sidebar
Let’s begin!
Customize your homepage
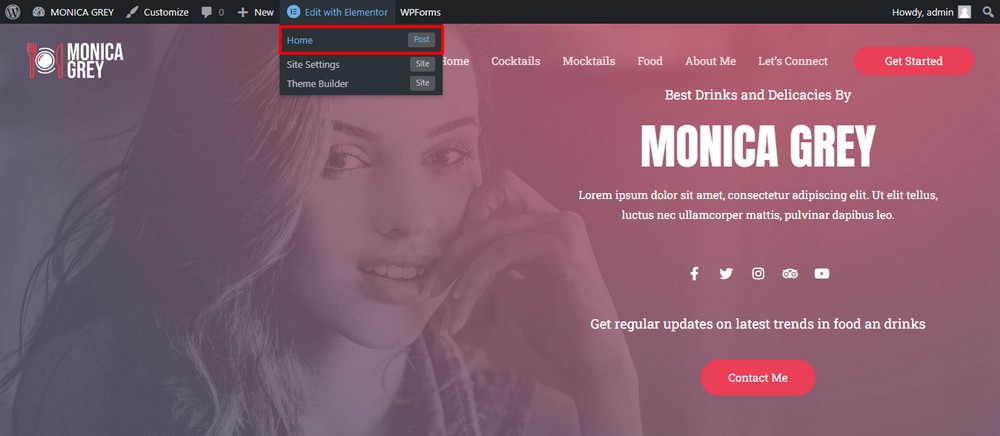
To customize the homepage, visit your website. Then click on Edit with Elementor > Home.
This will take you to the Elementor page editor panel.
You can change the basic details of your homepage from here.
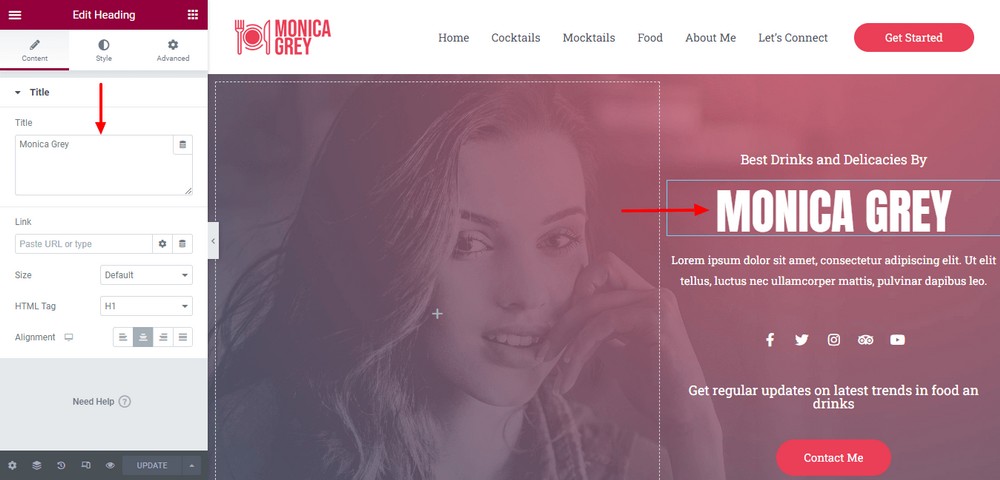
Press the green Update button at the bottom left regularly to save your changes.
Add restaurant image
As a food blogger, you may have tried many foods and know which recipes are perfect for which food. This helps your audience to find suitable recipes quickly.
You can use the logo area to feature popular recipes for your users.
Now, update the title of the logos section and make it ‘Popular Recipes’.
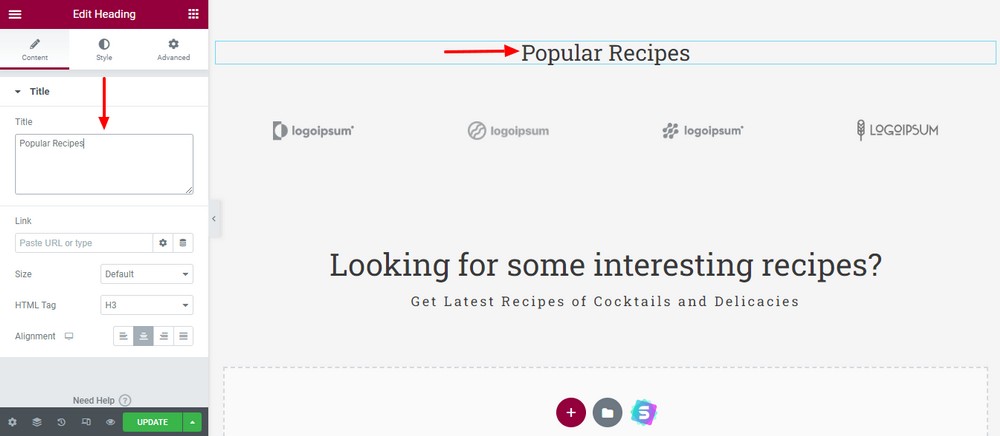
Let’s add an image to highlight popular recipes.
Click the image that you want to change. Then use the Choose Image option to insert a new one.
Use the other settings to make the image more catchy.
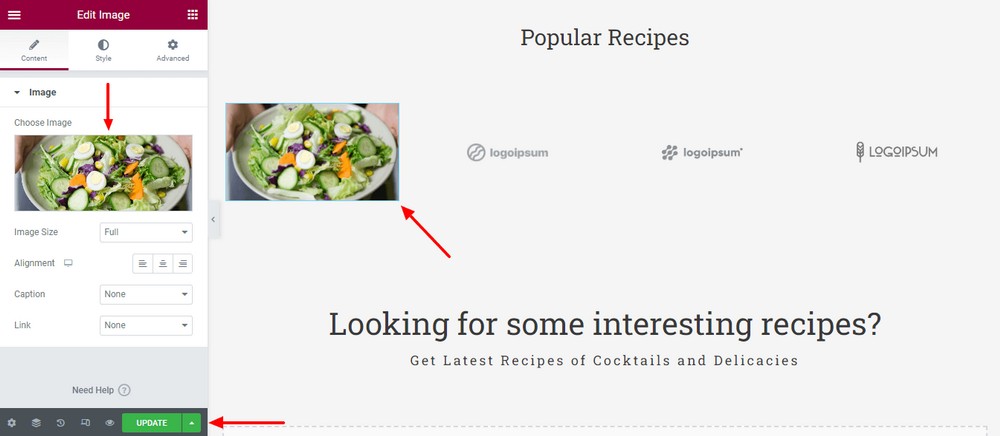
Press the green Update button at the bottom left regularly to save your changes.
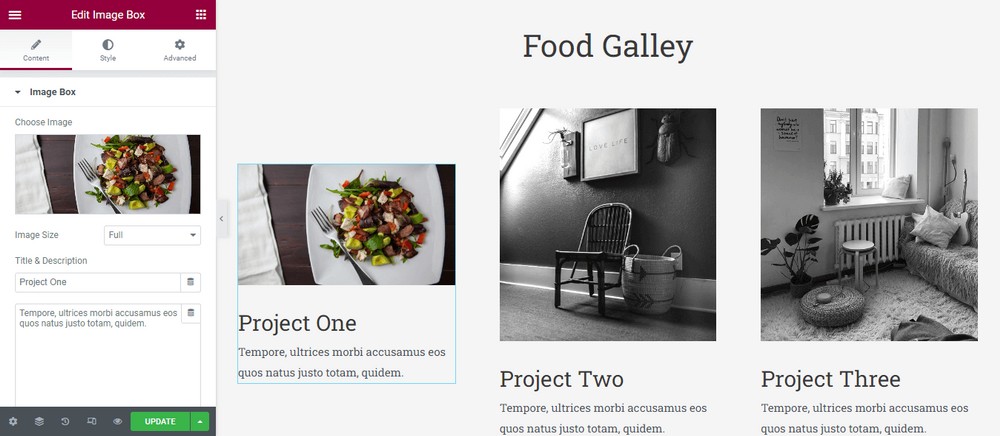
Import a portfolio block
Having a gallery or portfolio section is essential to feature food or recipe images on your website. You can add a portfolio section using the free Starter Templates ‘Portfolio’ blocks.
You can import the portfolio block in the right place on your website. For our case, we want to add the section right after the Popular Recipes area.
Click on the ‘Starter Templates’ icon.
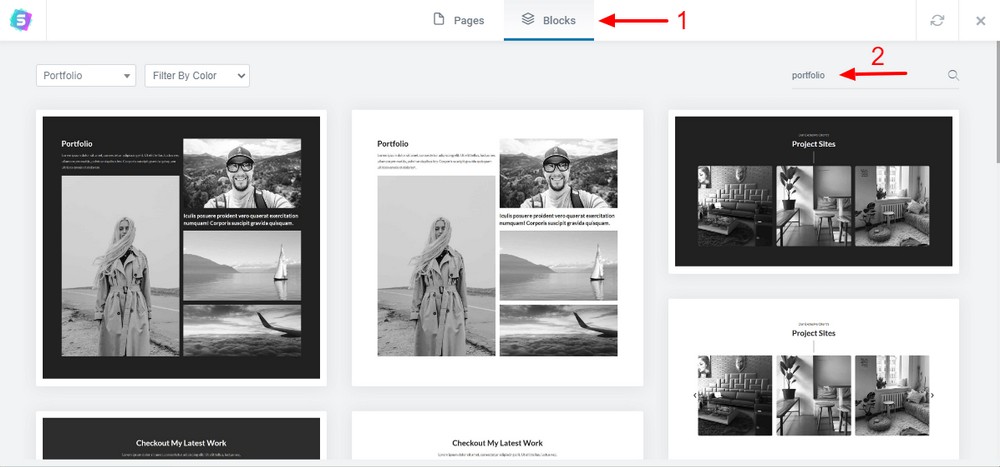
Select the Blocks tab. Now, search for portfolio blocks using the search bar.
You can also use the left side filter option to get all portfolio blocks.
Choose a block that you like
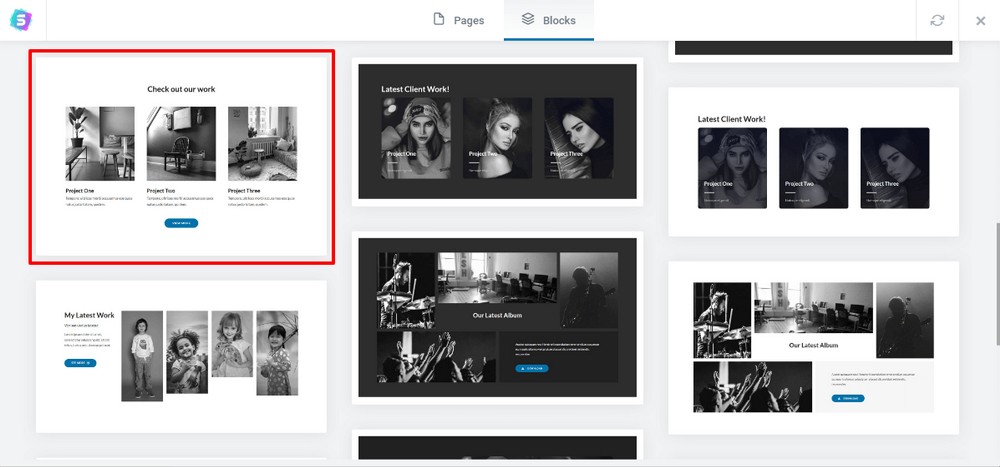
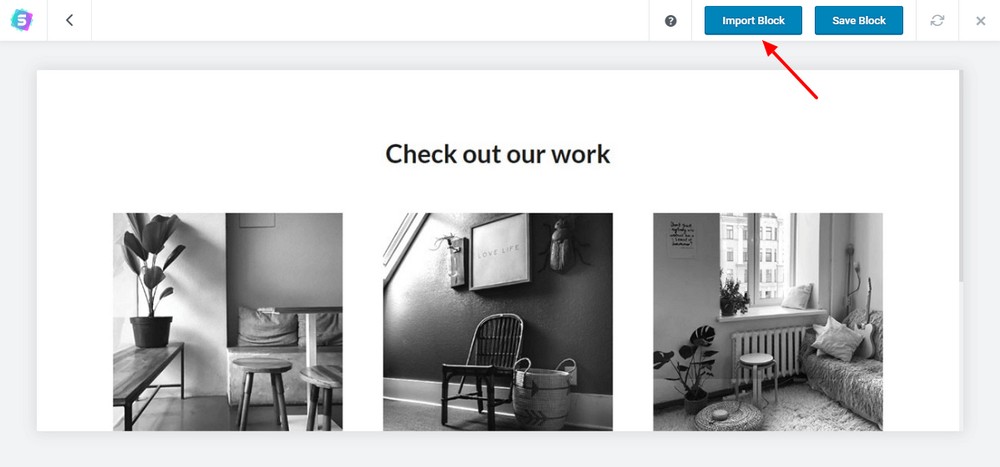
Hit the Import Block button.
See the block is imported on the website.
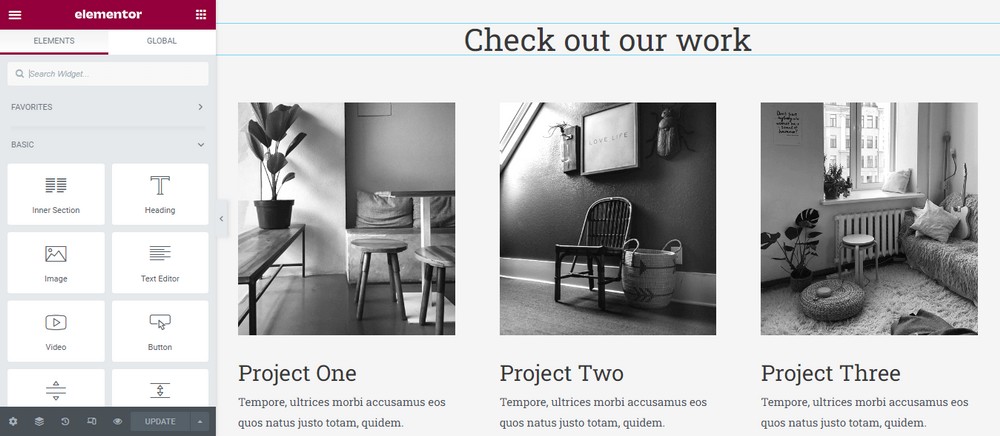
Now, you can customize the block in your own style.
You can change the heading like us ‘Food Gallery’. Also, you can add your food blogging images to the gallery area.
After adding the necessary blocks, don’t forget to hit the Update button to save the settings.
Read more: Check out the best WordPress portfolio themes reviewed by our team of experts.
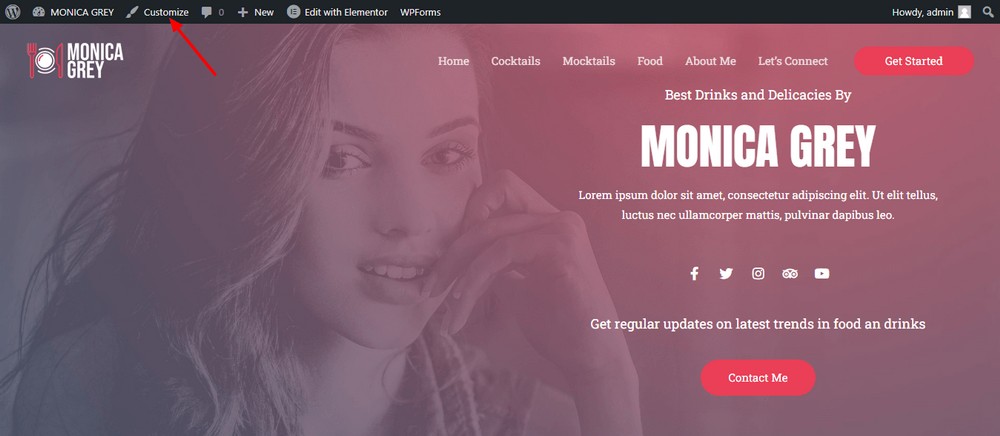
Add a newsletter form to the sidebar
To collect email leads, you can add a subscription form to your website sidebar area.
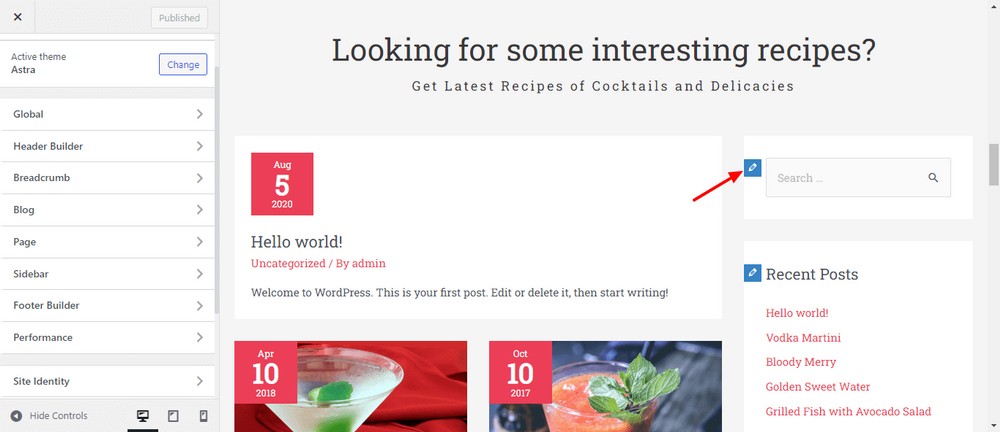
Visit your website’s homepage. Then hit the Customize link.
Now, click on the edit icon of the search field from the sidebar area.
Hit the ‘three dots’ icon. Then click on the Insert Before link.
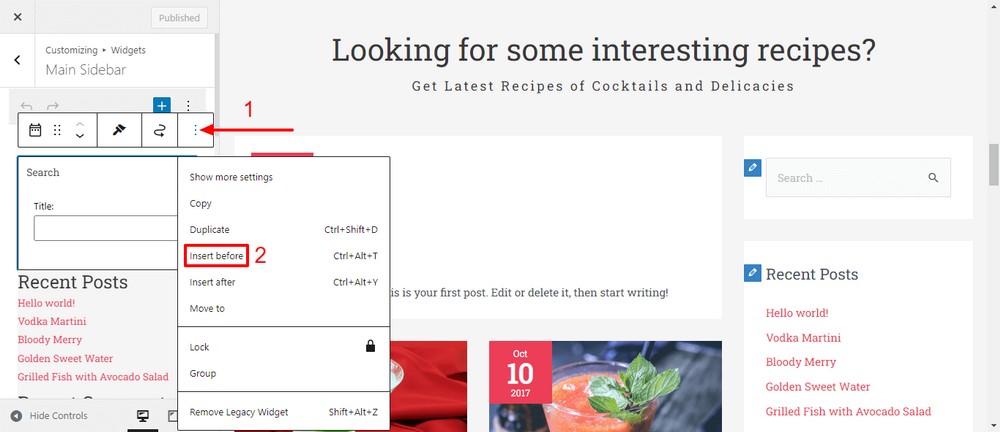
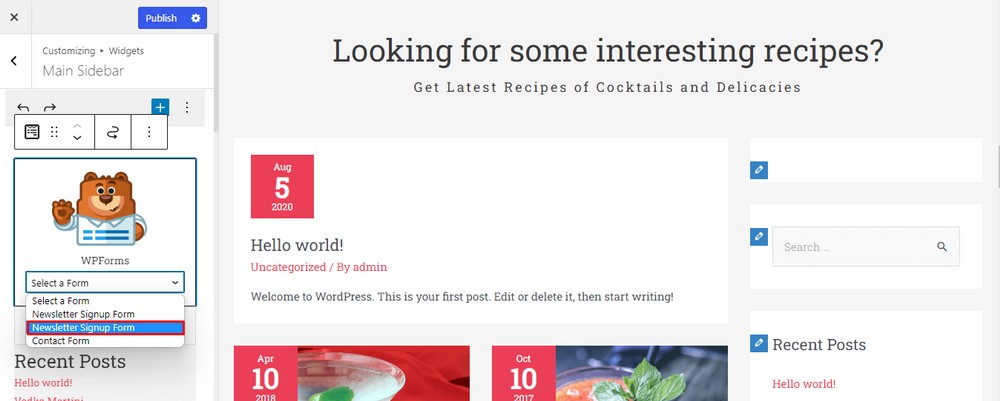
Press on the black ‘+’ icon and select the WPForms block.
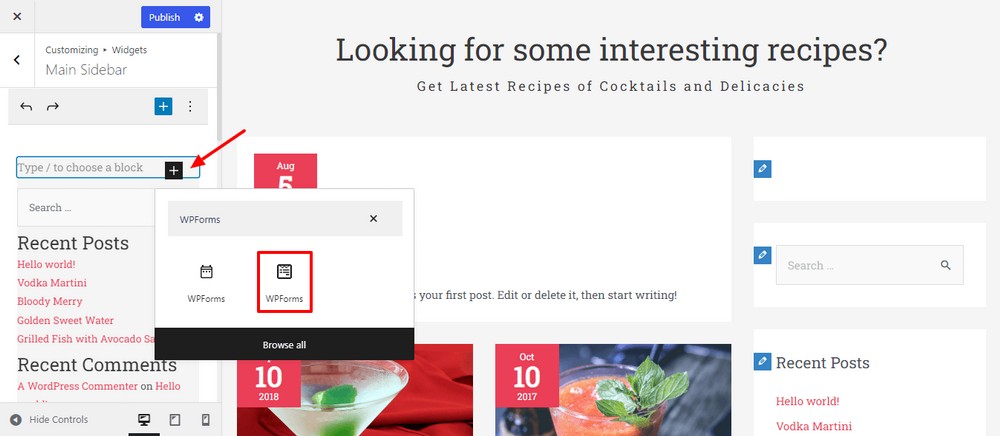
Now, pick the Newsletter Signup Form from the drop-down list.
Note: We’ve used the WPForms plugin to create our contact and newsletter forms. You can use any other contact form plugin that you like. If you don’t create any form previously on your website, you won’t find the form list in the drop-down box. Make sure that you’ve built a form before doing this.
Finally, you need to press the Publish button to save the setting.
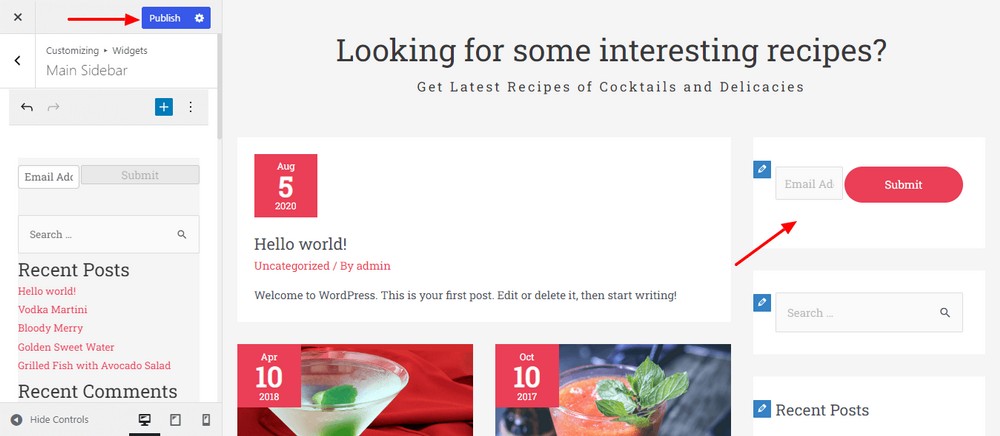
Now, it’s time to visit your newly created recipe website.
If you followed all the above steps and used the same template and blocks, your website will look similar to ours.
How to monetize your recipe website
You can create a recipe website to share your passion for cooking, top tips and recipes with your audience.
But, you can also turn your hobby into a profitable business. We’re going to share some proven ways to monetize a website.
If you apply the following tips, you can effortlessly turn your food blog website into a business.
Sell eBooks with your recipes
Selling eBooks can be a great way to earn money from your website. If you’re publishing articles and sharing different recipes, why not turn them into a book?
You can use your cooking images and videos to make your eBooks more engaging.
We would recommend creating unique content for your book as well as recipes from the site. Otherwise, anyone who pays for the eBook may feel shortchanged.
Display Google ads
Google AdSense is another effective way to monetize your website. You might see Google ads on many websites. Likewise, you can display ads on your website too.
You are able to use these ads on different pages of your website. Also, you can show ads on a single blog page or sidebar.
Make sure that you show only 2 or 3 ads on a single page. Displaying many ads might create negative impacts on the website user experience.
You should be careful with the ads’ placement on your website too.
You need to ensure that the ads won’t hide your website content. If you smartly display Google ads on your website, you’ll generate extra revenue for sure.
Many food bloggers earn the most part of the money from displaying ads on their blogs.
Sell related products
You just need to install and configure the WooCommerce plugin on your website to begin selling. Then add the products to your website and start earning money.
Similarly, you use your recipe website to start your eCommerce business. You can create an online shop to sell various cooking items and promote them within your content.
Explore this handy article to learn how to create an online store using WooCommerce.
Allow affiliate marketing
Affiliate marketing is one of the most popular methods of making money for bloggers, including food bloggers. Most affiliate marketers use their websites to promote other businesses in exchange for a commission.
While promoting different products, marketers usually write articles. They also make videos to review other products. As a food blogger, you can highlight restaurants on your website to make money.
If you run an online store to sell your food or cooking items, you can invite affiliate marketers to promote your product on their website. This effective marketing strategy helps you to increase the sales of your online store.
You can promote food items, cooking accessories and kitchenware from different food and cooking companies on your website.
You add links to those products in your blog posts or cooking recipes. Also, create cooking videos using the promotional products.
If a customer completes their purchases using your affiliate links, you earn a commission.
Sell cooking courses
You can make money from your website by selling cooking courses. If you have a lot of experience cooking, you can use your expertise to educate others.
A website is a perfect platform for selling cooking courses. You need to create videos about your cooking class and then post them on your website for sale. It helps other users learn how to cook and learn different recipes.
They get their benefits. You get money from them in return.
Try LearnDash to create cooking courses. It’s a popular learning management system for WordPress. This tool has all the essential features to create an engaging online course.
Check this article to learn more about creating courses using LearnDash.
How to attract visitors to your recipe website
Once your recipe website is ready, you can create a blog to communicate with your followers and customers. You can use the blog to share cooking tips, food-related stories, nutrition advice, upcoming events, and product announcements. Now, we’re going to share some exclusive tips to help you to drive more traffic to your recipe website:
- Use recipe schema
- Use social media
- Create a YouTube channel
- Use imagery and Instagram
- Utilize email marketing
- Guest blogging
- Run paid ads
Let’s get started.
Use recipe schema
Schema Pro is an effective tool that helps you organize your website metadata. It improves your website SEO in a few clicks without touching a single line of code. It has a recipe schema that helps your website content get a higher ranking in search results.
Your website content could also be placed in Google featured snippet if you use the correct schema.
So try Schema Pro on your recipe website to get more traffic to your website.
Use social media
You can utilize the power of social platforms to get new visitors by sharing your recipe and cooking tips.
You can also share your website blog posts directly on the social channel or create a group to discuss your food blogging experience.
Create a YouTube channel
If you want to drive a decent amount of traffic to your website, create a YouTube channel. Then you can upload your recipe videos to your channel to attract new users.
Cross-promote videos in your blog content and your blog content in your videos. That way, you capture fans of both mediums for maximum exposure.
Use imagery and Instagram
Quality images are essential if you run a recipe website and you can use your images to post on Instagram. It’ll create an opportunity to attract new visitors to your website with very little effort.
If users like your food photos, there may be an option to drive new users to your website. So don’t compromise on image quality.
Quality images improve the user experience and engagement rate on your website.
Utilize email marketing
Email marketing is very effective for attracting new visitors to your website. You can use the email subscription form on your website and users can subscribe to your newsletter.
You then have the option to create an email list.
Create interesting newsletters and compelling content and your readership should grow. Engagement should grow too over time.
Guest blogging
You contribute to other food bloggers publishing guest posts on their websites. It helps them to get free content from you and in return, you’ll get a backlink from their website.
You can submit guest posts to popular websites like foodgawker or Serious Eats to get new visitors to your website.
Run paid ads
Using Google Adwords, you can run paid ads to attract your target audience. You can also use social media platforms like Facebook and Twitter to run ads.
You will need to spend some money. But the payoff could be a sharp increase in qualified traffic to your website.
That has to be worth paying for!
Wrapping up
In the above guide, we’ve shown how to create a recipe website to start blogging. We’ve also shared some proven strategies that might help you to monetize your website the right way.
We also shared some tried and tested tips to get more potential traffic to your website. And some ideas on how to monetize your recipe website the right way.
Do you run a recipe website? Used this guide to build a successful recipe blog? Have any insights to help others? Tell us your story below!
Please subscribe to our newsletter to get more fresh articles on WordPress.

Pratik Chaskar holds the pivotal role of CTO at Brainstorm Force, serving as the backbone of the company. Renowned for his organizational skills, strategic thinking, problem-solving attitude, and expertise in leading and executing plans, Pratik plays a crucial role in the BSF’s technological landscape.
Disclosure: This blog may contain affiliate links. If you make a purchase through one of these links, we may receive a small commission. Read disclosure. Rest assured that we only recommend products that we have personally used and believe will add value to our readers. Thanks for your support!


Hello
really very very helpful article
thanks