
If you haven’t been living under a rock, you’ve probably heard of online stores like Amazon, AliExpress, eBay, and Etsy. You’d probably also be aware that these major online stores don’t have a product of their own to sell.
Does that mean Jeff Bezos, the founder of Amazon, amassed all that wealth without owning a single product? You bet he did!
Amazon may make and sell its own products now, but in the beginning, it just sold other people’s products.
Want to create an online marketplace similar to Amazon? Want to create a marketplace using WordPress without owning a single product? Want to be the next Jeff Bezos?
Who wouldn’t?
Unlike a conventional online store where you manage inventory and promote those products online, in a marketplace, you have multiple vendors promoting their own products.
They manage inventory and all the logistics involved, such as billing, packaging, and delivery. All you have to do is provide a platform for buyers and sellers to meet.
And for all your efforts, you get paid a commission for every sale that happens through your store.
Fortunately, creating an online marketplace with WordPress is easier than you may have imagined. Want to know how to create one?
Let’s dive in!
- What Is WordPress?
- What Is WooCommerce?
- What Is a Marketplace?
- Pros and Cons of eCommerce Marketplaces
- WordPress + WooCommerce vs Alternatives
- What You Need To Set Up an eCommerce Marketplace
- How to Build an eCommerce Marketplace With WordPress and WooCommerce
- Taking Your eCommerce Store Further
- Online Marketplace FAQs
- Have You Created an Online Marketplace with WordPress?
What Is WordPress?
WordPress is a content management system (CMS) that powers more than 42% of the websites worldwide. A content management tool allows you to easily create and manage your website content without writing a single line of code.
Whether it is to create a simple blog, a full-fledged online store, or even an elearning website, using WordPress, you can easily make any kind of website, even if you aren’t a developer.

WordPress is open source and licensed under GPL (GPLv2 or later). This means that you can download the WordPress software for free and customize it however you want.
The popularity of WordPress can be credited to the immense flexibility it offers. The WordPress ecosystem provides you with an extensive range of themes and plugins which makes creating any type of website simple.
For instance, once you’ve installed WordPress, your next step would be to install a theme to make your website look great.
Currently, there are well over 8800 free WordPress themes that you can choose from. One such free and lightweight theme is our very own Astra.

Once you’ve installed a theme, you can install WordPress plugins to enhance your website functionality further. You have a plugin for just about any feature you’d like to add.
Want a plugin to help you improve your chances of ranking higher on search engines? Install an SEO plugin such as Yoast SEO, SEOPress, RankMath or All in One SEO Pack.
Want to convert your simple website into a full-fledged online store? Install WooCommerce.
Want to carry out periodic backups of your website on autopilot? Install plugins such as Updraft Plus, BackWPup, BlogVault, or one of the many others.
The point is, there’s a lot you can do with WordPress!
What Is WooCommerce?
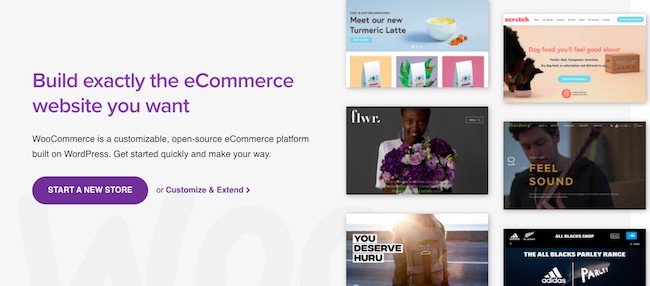
WooCommerce is a hugely popular WordPress plugin that turns your website into a full-fledged eCommerce store in literally a few clicks. WooCommerce is the cheapest option to build an eCommerce website that is functional and future-proof.
It integrates seamlessly with WordPress and includes everything you need to run a successful online business.
Whether it’s selling physical or digital products, managing inventory, tracking orders, or even setting up payment providers, WooCommerce offers some fantastic features right out of the box.
WooCommerce, just like WordPress, is open source and hugely popular, offering plenty of features and flexibility. The best part is, it’s beginner-friendly, and you don’t need to be a developer to create some fantastic online stores.
Like WordPress again WooCommerce has an extensive library of plugins to extend its functionality.
Facts and Figures
WooCommerce is the most popular eCommerce solution. Here are some numbers that will underline its popularity:
- Currently, there are over 4.5 million websites powered by WooCommerce
- 7.4% of the websites worldwide use WooCommerce
- As of Jan 2025, WooCommerce has been downloaded 82.5 million times
- 29.35% of all online stores are powered by WooCommerce, followed by Shopify
- Out of the top 1 million eCommerce sites, 22% are powered by WooCommerce
- There are 2.4 million more WooCommerce sites than those created using Magento
- For automatic recurring payments, you can integrate WooCommerce with over 30 payment gateways
(Source: Hosting Tribunal)
We have hardly scratched the surface as far as the potential WooCommerce offers. All that said, if you’re looking at the best option to create an online store with WordPress, use WooCommerce!
What Is a Marketplace?
An online marketplace is a website where you can find different brands of products listed from multiple vendors.
We mentioned a few of the larger marketplaces in the introduction. They include Amazon, AliExpress, eBay, Etsy, Google Express, Mercado Libre, Rakuten and many others.
They are a trading platform where sellers and buyers come together and carry out transactions. Independent sellers promote their products, and buyers choose from the best offers.
As the platform owner, your primary responsibilities are to generate traffic, process the payments and have the site up and running at all times.
You needn’t worry about managing inventory, packaging, and shipping. It’s all taken care of by the third-party vendors.
For this, you get to charge a commission for every transaction that happens on your platform.

Did you know that there are 9.7 million sellers worldwide on Amazon? Of which, approximately 1.9 million continue to sell using the Amazon marketplace actively. Also, in the fourth quarter of 2020, Amazon made over $125 billion in sales revenue. (Source: Oberlo)
This takes us to an all-important question.
What’s the Difference Between a Marketplace and a Classic Online Store?
You’d know by now that a marketplace sells products from various vendors and sellers.
And that’s the beauty of this business model.
You don’t need to worry about inventory and managing packing and shipping. It’s all taken care of by the vendors.

In the typical eCommerce scenario, the website owner has to do it all.
From ensuring you have enough website traffic coming to sourcing products, managing inventory, packing, shipping, and even refunds, it’s all the eCommerce store owner’s responsibility.
In a traditional online store, your income is based on the sale of your products. You’ve also got to factor in the overheads and the effort to accomplish the various activities, right from sourcing the product to shipping. In some cases, handle refunds too.
Online marketplaces allow you to earn commissions from the sales of just about any product on your platform without much of the hard work.
Pros and Cons of eCommerce Marketplaces
Just like everything else, online marketplaces have their advantages and disadvantages. Here’s a look at the pros and cons of eCommerce marketplaces:
Pros of Online Marketplaces
- Easy to manage: You needn’t worry about sourcing the products. All you have to do is create the platform, ensure the smooth running of the platform, generate traffic, and coordinate the release of payments to vendors from sales
- Easy to scale: Once you’ve built a secure platform, it really doesn’t matter if you’ve got a single product or several thousand products
- Higher-income opportunities: The more products sold on your platform, the higher your income possibilities are. You can even introduce membership plans and listing fees as additional sources of monetization
- Buyers get more choice and better pricing: Buyers get a more comprehensive range of options to choose from. As there could be several vendors selling the same product, buyers benefit from competitive pricing
- Sellers get higher visibility: Smaller store owners needn’t invest in their own eCommerce store and can save on marketing costs
Cons of Online Marketplaces
- Takes time to build: It’s a catch 22 situation here. On one hand, sellers ready to partner with you would expect traffic and sales from day one. On the other hand, it takes time and effort to build that traffic
- Your brand is on the line: Product quality is not in your hands. Neither is the delivery. However, the buyers know your store name. So, if a seller doesn’t deliver as promised, your brand may suffer
- Stiff competition: You are competing against the Amazons and the eBays. So you have stiff competition to deal with. That being said, there’s always room for another player!
WordPress + WooCommerce vs Alternatives
Now that we’ve covered what a marketplace is and if an online marketplace makes sense or not, let us look at some popular platforms used to create one.
Call us biased, but you’ll probably agree that the combination of WordPress and WooCommerce works best when you want to create an online marketplace.
We’d like you to decide for yourself so we’ve listed some alternatives to create a marketplace.
Let’s explore them.
WordPress + WooCommerce vs Shopify
The first alternative in our list is Shopify.

Shopify is a popular SAAS-based online store platform ideal for creating a marketplace. Creating and getting started with an online store using Shopify is as simple as it gets.
Sign up for an account, select a free theme, integrate your payment providers, and you should be good to go. And that’s primarily the reason for Shopify’s popularity. A beginner-friendly approach!
With Shopify, you needn’t worry about the technical aspects. From hosting to security and backups, it’s all taken care of for you.
However, unlike WooCommerce, using the Shopify platform comes with a monthly subscription.
You have limited free themes and extensions that you can make use of. For additional features and functionality, you’ve got several subscription plans.
Here’s the good and not-so-good about Shopify and WooCommerce.
| Shopify | WooCommerce |
| Shopify is a hosted solution. You needn’t worry about installing Shopify. It’s all done for you. They take care of all the backups, updates, and security aspects as well | It’s a self-hosted solution where you’ve got to install WooCommerce, run updates, maintain backups, and store security. It’s all your responsibility |
| Shopify is beginner-friendly. Starting an online store with Shopify is easy | There is a slight learning curve. Once you’ve got the hang of it, it’s pretty straightforward |
| Minimal themes (both free and paid) | Unlimited free and paid themes |
| 24/7 support via email, chat, phone. You’ve also got support via their documentation and forums | WordPress and WooCommerce have a very active community, and you can have your queries answered via their forums. There’s ample documentation support as well |
| Limited customization options | WooCommerce being open source, there are limitless customization possibilities. Tweak the code just the way you want |
| Shopify charges transaction fees unless you use their payment gateway | WooCommerce charges no transaction fees. The only transaction fees you’ll pay is to your preferred payment gateway |
| Shopify has limited apps and extensions. Most of them come behind a subscription plan and are pretty costly | WooCommerce offers many extensions. While most of them are free, for additional features and functionality, there’s always a paid version |
| Shopify is not free. You have a 14-day free trial, then you’ll have to get a paid plan. The plans start from $29 per month | WooCommerce is completely free. You will need to pay for hosting and domain name though |
So, while Shopify is more straightforward to get started, you’ll have to consider the running costs in the future.
However, when you are trying to maximize your profits by reducing overheads and additional transaction costs, WooCommerce indeed makes sense in the long run.
If you are already invested in Shopify, then our guide on migrating Shopify to WooCommerce will come in handy!
WordPress + WooCommerce vs Wix
The next alternative on our list is Wix.
Wix is a popular drag-and-drop website builder. Its ease of use and beginner-friendly user interface allows just about anyone to create an amazing-looking website.
Using Wix’s eCommerce platform, you can launch a professional-looking online store and start selling quickly.

Just sign up for an account, choose from their 500+ online store templates, customize the store to suit your requirements, add products, integrate a payment provider of your choice, set up shipping, and add a custom domain.
You are then good to launch your eCommerce store and start selling.
However, to add a custom domain and make use of the full range of eCommerce features that Wix has to offer, you’ve got to sign up for one of their paid plans.
Let’s compare the two platforms.
| Wix | WooCommerce |
| Wix is a hosted, web-based solution. The platform is all set up for you. You needn’t worry about updates and security | WooCommerce is a hosted solution where you’ve got to manage it all |
| Beginner friendly and easy to use | Involves a slight learning curve |
| Ideal for individuals and small businesses | Can be used by individuals and businesses of all sizes |
| Limited customization using the WYSIWYG drag-and-drop editor | Limitless customization |
| 500+ themes to choose from | Unlimited themes (free and paid) |
| 250+ apps and widgets to extend the features and functionality of your Wix website. Some are free, and some are paid | 59000+ plugins to extend the functionality of your WordPress website. The majority are free, with the option to upgrade to a premium version |
| Support via email, phone, live support | Support via forums, and online documentation |
| Wix has a wide range of paid plans, starting from $4.50 per month. The basic plan for an eCommerce store starts at $20 per month (paid annually) | WooCommerce is free |
Just like Shopify, Wix, scores well as far as the ease of starting an online store is concerned. It has more limited options and scalability potential though.
With its flexibility, customization, themes and plugins, WooCommerce is a winner here too.
WordPress + WooCommerce vs Magento
The last alternative on our list is Magento. Rather, Adobe Commerce. Magento was acquired by Adobe in 2018 and is now named Adobe Commerce or Magento Commerce.

Unless you’re a developer or have a team of developers working on your online store, you may need help setting up. Most store owners are not programmers, which may be a problem.
Magento may not be your best bet if you just want to sell online.
Like WooCommerce, Magento has an open-source version, but it’s a lot harder to learn. You’ll need a fair amount of training before you start building stores using Magento Commerce.
Magento Commerce is ideally suited for medium to large-scale enterprises. However, they offer an open-source edition for small businesses, Magento Open Source.
So, how does Magento Open Source stack up against WooCommerce?
| Magento Open Source | WooCommerce |
| The open-source version is free but requires technical knowledge | Free platform with a far less learning curve compared to Magento |
| A self-hosted eCommerce platform that requires specialized knowledge to install | A self-hosted eCommerce platform that you can install effortlessly |
| Unlimited extensions, but not all are free | Unlimited free and premium WooCommerce related plugins and extensions |
| Multiple themes are available but you will need a CLI (Command Line Interface) to install the themes | Several free and paid themes are available that can be installed with a click of a button |
| An active community and development team to address security concerns | WooCommerce is updated regularly and has several built-in security features |
| Offers complete customization | WooCommerce too can be completely customized |
Magento open source offers you the same level of customization and flexibility that WooCommerce offers. However, it requires a lot more technical knowledge to get it up and running.
What You Need To Set Up an eCommerce Marketplace
If you are sitting on the fence wondering if it makes sense to start an eCommerce marketplace, here are some eCommerce stats to put your apprehension to rest:
- The global eCommerce market is expected to total $4.89 trillion in 2021
- Online retail sales will reach $6.39 trillion
- Mobile commerce will hit $488 billion in sales until 2024, which is 44% of all eCommerce transactions
(Source: Shopify)
Want a bite of the cherry? Start an eCommerce business!
And if you don’t want to deal with your own products, packing, delivery, and the various other nuances of an eCommerce business, start an online marketplace!
Starting an online marketplace is relatively straightforward and less complicated than you may have imagined.
While we will discuss each of these in detail, here’s a list of steps required to set up an eCommerce marketplace:
- Pick a domain and hosting
- Select the ideal website/eCommerce platform
- Add your products
- Select a payment gateway
- Set up shipping
- Optimize your store
- Test, track, and launch your store
Sound simple? It really is!
How to Build an eCommerce Marketplace With WordPress and WooCommerce
Here’s how to build an eCommerce Marketplace With WordPress and WooCommerce.
Step 1: Get a Good Web Host Capable of eCommerce
Considering you’ll be having several vendors on your platforms promoting their products and an even higher number of website visitors, you’ll need a stable and secure WooCommerce hosting. One that doesn’t let you down and manages the website traffic like a charm.
There are many options in the market, such as SiteGround, BlueHost, WP Engine, Kinsta, and more.
We recommend SiteGround.

SiteGround servers are optimized for speed and support both WordPress and WooCommerce. They provide WordPress auto-updates, free SSL, free CDN, daily backups, and more.
And the best bit is, their fantastic customer support is just an email, call or live chat away.
SiteGround offers WooCommerce hosting plans starting from $3.99 per month. Opt for one that’s most suited for your business and complete the registration process.
By using our SiteGround link, you also get a discount of up to 73% on your first payment!
Step 2: Install WordPress
Another significant advantage of SiteGround is the ease with which you can install WordPress.
Once you’ve purchased your hosting, head over to WordPress > Install & Manage from within your SiteGround dashboard.

You can select either the WordPress or WordPress + WooCommerce option.
For now, just select the WordPress option.
During the installation process, you’ll be prompted to create your WordPress login credentials. Save them somewhere safe as we’ll be needing them later.
Once the setup process is complete, you’ll be able to access your WordPress login by adding a ‘/wp-admin’ to your domain.
For instance, if your domain is onlinestore.com, then your WordPress login page will be onlinestore.com/wp-admin.

Use the credentials you just created and log in to your WordPress dashboard.

Want detailed assistance on the entire WordPress installation process? Check out our in-depth guide on how to create a WordPress website.
Step 3: Install WooCommerce
The next step is to install WooCommerce.
Navigate to Plugins > Add New and search for WooCommerce.

Click on Install Now and then Activate.
Once activated, you’ll be prompted to fill in some details related to your WooCommerce store.

Complete all the details so WooCommerce can set up the foundations of your new store.
You’ll then be directed to the WooCommerce dashboard.

From options to customize your store to adding products, snapshots of your sales and traffic, your WooCommerce dashboard provides you with several metrics all in one place.
Now that we’ve installed WooCommerce, let’s install an eCommerce theme.
We may be biased towards our Astra theme, but when you have more than 1.6 million websites powered by Astra, we can’t help but recommend the best!
Astra is a lightweight WordPress theme that loads fast and is built for performance. It’s optimized for search engines, mobile-friendly, and conversion-optimized.
Head over to Appearance > Themes > Add New and search for Astra.

One of the best things about Astra is the pre-built Starter Templates. You can easily import a professionally designed template with a couple of clicks.
To activate and use our Starter Templates, head over to Appearance > Astra Options and click on Install Importer Plugin.

During the setup process, you’ll be asked to select a page builder of your choice. Select your favorite page builder to proceed.
Once that’s completed, you’ll be presented with a range of website templates to choose from.
Search for a niche that you are interested in or simply search for an online store.

You’ll be presented with several options. Some of these are free, while others come with our Agency bundle.
Select a template and complete the import process.
For instance, we’ve selected Simply Natural.

You have the option to import a single template or import the entire site.
Click Import Complete Site.

Once that’s done, you’ll have a full-fledged, professional-looking eCommerce site up and running.

Step 4: Initial Setup of WooCommerce
Apart from adding the actual products and content, your online store is good to go. However, there are a few more settings that we need to cover first.
Head over to your WooCommerce dashboard.
You notice a bunch of to-dos under the Get ready to start selling section.

Go ahead and complete these. It’s pretty straightforward and has an easy-to-follow walk-through.
For instance, click on Add my products.

There are several easy-to-follow steps showing you how to add products to your store.
Let’s take another example. Click on Set up payments.

The setup process is pretty straightforward.
Even adding the much-needed refund and return policy page to your online store has been made easy with the help of some draft pages.

Once you’ve completed the various steps mentioned above, head over to WooCommerce > Settings.

Assuming that you’ve completed most of the steps on your WooCommerce dashboard, most of these general settings should be filled in.
For more details, check our beginner’s guide on how to set up WooCommerce.
Step 5: Plugins To Turn Your WooCommerce Online Store Into a Marketplace
We now have WordPress and WooCommerce installed. It’s now time to turn our store into a marketplace!
The default WooCommerce installation allows you to showcase products from a single vendor.
In order to convert your WooCommerce store into an online marketplace, we need to install a marketplace plugin.
There are several marketplace plugins that you could consider installing.
Some of them include MultiVendorX, WC Vendors Marketplace, WCFM Marketplace, among others.
The marketplace plugin that we will install is called Dokan.

Dokan is a popular multi-vendor marketplace WordPress plugin that is powered by WooCommerce. Using Dokan, you can create your own marketplace similar to Amazon and eBay quickly.
Not only can you sell physical products, but you can also sell digital products too.
Dokan is free to download. However, if you are serious about creating a full-fledged online marketplace, you’ll have to consider one of their subscription plans for the extra features.
Dokan’s paid subscriptions start from $149 per year.
To begin, head over to Plugins > Add New and search for Dokan.

Install and activate the plugin.
Once activated, you’ll be prompted to complete the setup process.

Some of the key settings include an option to:
- Assign shipping fees to vendors or admin
- Assign the tax fee recipient to vendors or admin
- Set your commission type to a flat rate or percentage
- Assign your percentage amount from each order
- Enable PayPal or bank transfer for your vendors as a withdrawal method
- Set a minimum balance required for your vendors to make a withdrawal request
Once you’ve completed the setup steps, your marketplace is ready.

Click on Return to the WordPress dashboard.
Navigate to Dokan > Dashboard.

Your Dokan dashboard provides you with a snapshot of how well your marketplace is performing. From the revenue earned to the number of vendors and products, it’s pretty informative.
With your marketplace all set up, there’s a small change in settings that you’ve got to carry out.
Head over to Settings > General and check the box ‘Anyone can register.’

This will now allow your vendors to register themselves on your store.
Once they do register, you can easily add them to your store.
Head over to Dokan > Vendors and click on Add New.

Once the details are added, you have the option to notify the vendor via email that they’ve been added to the system.
To allow your vendor to start selling in your store, simply activate the status button.

Once that’s done, your vendor can start adding products.
Step 6: Adding Products
As the store owner, you can add products by heading over to Products > Add New.
You could check out our detailed guide on how to add and manage products in WooCommerce.
Now, unless you’d like to add products for all your vendors, it’s best you allow them to add products on their own.
Once a vendor has been added, they’ll have their own dashboard. The login credentials and URL are sent to them via email when they register.
To ensure your vendors can access their dashboard, head over to Dokan > Settings.
Under the General tab, make sure the ‘Disallow Vendors and Customers from accessing the wp-admin dashboard area’ option is unchecked.

Then under Selling Options, make sure ‘Allow newly registered vendors to add products’ option is checked.

Your vendors can now easily add products from their own dashboard.

This way of working saves you time and resources from having to add products by yourself!
Step 7: Setting up Shipping
WooCommerce handles the shipping part of your marketplace. The default shipping options can be configured to work with Dokan.
Check our guide on how to set up WooCommerce shipping options to help you get started.
Vendors will not be able to configure any shipping charges by themselves. For that, you will need Dokan Shipping, which comes with the Pro version.
Dokan plugin enables vendors to add shipping costs from their front end.
For the Dukan shipping options, head over to WooCommerce > Settings > Shipping > Dokan Shipping.

If you want to control the shipping charges and keep them uniform across your store, stick to the default WooCommerce shipping options.
Step 8: SEO and WooCommerce
Most of us rely on search engines for answers or solutions to our queries. So, wouldn’t it make sense to ensure our store is found on those search engines?
The higher our store ranks on the search engine results page, the higher are our chances of promoting the various products on the store.
For this, we’ve got to work on improving store’s SEO performance.
By optimizing our online marketplace for search engines, we can increase visitors and, in turn, boost conversions.
So, the big question now is, how do we go about optimizing our WooCommerce store?
Unlike conventional SEO, where we optimize the content, we’ve got to focus on optimizing the product keywords for our store.
This would include optimizing the product title, description, image name, image alt text, meta description, using breadcrumbs, and the slug URL.

Have the keywords added naturally and logically without having to keyword stuff.
To help optimize your WooCommerce store, check out our ultimate guide to WooCommerce SEO.
Step 9: Tax and Payments
A crucial part of any online store is accepting payments. And it is no different with an online marketplace. Fortunately, Accepting payment with WordPress is just a matter of installing a plugin!
By default, WooCommerce offers several payment options, some of which are direct bank transfer, cheque payment, and cash on delivery.

Additionally, you can also integrate credit cards, PayPal and Stripe. All of which work perfectly fine with Dokan.
However, all these configurations are done by the store admin. Vendors cannot edit these settings.
With Dokan’s built-in support for WooCommerce taxes, vendors can select the tax classes set by the admin while adding a product to the store.
To begin, head over to WooCommerce > Settings > General.

Check on the ‘Enable tax rates and calculations’ box. When you are done, click Save changes.
This adds a new Tax tab under your WooCommerce settings.

Enter the various tax components. Be it standard, reduced, or zero rates, all of these can be set under the tax tab.
Tax components are pretty tricky, and it’s recommended that you check with your local authorities when it comes to adding taxes for various shipping locations.
Step 10: Optimizing WooCommerce
Optimizing your online store can be achieved in more than one aspect. You can optimize your store for user experience, performance, SEO, responsiveness, usability.
While the end goal of any optimization process is to increase conversions and sales, the benefits of optimizing your online store are many.
Some of the common ways to optimize your WooCommerce store include:
- Choosing the right theme and plugins
- Selecting a reliable and fast hosting
- Image and video optimization
- Using a content delivery network (CDN)
- Use conversion-optimized checkout pages, such as CartFlows
- Caching
- Code optimization
- Speed testing
Want more? Check out our ultimate guide on optimizing your WooCommerce website.
Step 11: Testing Your Store
Now that you’ve completed the setup steps, it’s time to test run your online marketplace.
One way to test your online store is to create a few fake accounts and register as a vendor. Then add products and see what your store page looks like.
Once you are done adding products, play the role of a customer. Add a few items to your shopping cart and complete the entire checkout process.
If all this looks good and you didn’t face any problems, you could go the extra step and get a local store to add their products.
Offer them your services for free to add their products to your store. Of course, you still get a percentage commission of every sale that goes through, but few vendors would refuse a free service!
By adding some real products, including the relevant taxes, and shipping, you can understand if your store works as advertised and is suitable to begin reaching out to vendors.
If it all looks good, you are good to launch your online marketplace!
Taking Your eCommerce Store Further
You have your store up and running. That’s the first step completed successfully.
Now it’s time to take your online marketplace further. And we’ve not referring to just the marketing activities required to spread the word.
Activities such as online paid advertising, social media promotion, email marketing, content creation, optimizing content for SEO, influencer marketing, and more have to be a part of your marketing strategy. That’s a given.
In addition to the above, we’d like to focus on those few extra elements that can make all the difference and help boost your sales and revenue.
Email marketing gives you the best ROI compared to any other marketing method. By building and nurturing your email list, you have a database of potential customers receptive to your communications.
While it helps communicate to your audience about the launch of your online marketplace, we’d like you to incorporate email marketing for cart abandonment too.
Cart abandonment is when your customers add items to their cart but don’t complete the purchase.
Did you know that the average cart abandonment rate is close to 70% across all industries? And this is even higher at close to 86% for mobile users.
That’s like 8 out of 10 customers who don’t complete their purchase. That’s a lot!
Brands lose close to $18 billion in revenue each year due to cart abandonment. The primary reason for this is the extra costs that are included during checkout. (Source: Sleeknote)
What if you could get them to complete their purchases? What if you could send out an email to all these customers?
That’s where a plugin such as WooCommerce Cart Abandonment comes into play.

This plugin captures the customer’s email address during the checkout process. A series of follow-up emails are then sent out if the purchase hasn’t been completed within 15 minutes. And all this is done on autopilot.
You can have all your follow-up emails planned and set for specific time intervals. Your emails can remind the customer to complete the purchase, offer a discount, ask for feedback and a lot more.
CRM
While planning your online store development, have you considered including a Customer Relationship Management (CRM) tool?
Most store owners (and we are guilty of the same) plan the eCommerce platform, the theme, the plugins, the payment gateways, shipping providers, and so on when starting with our online store.
While all these are crucial for any online store, we miss out on equally essential elements, such as a CRM tool, until the need really arises.
By installing WooCommerce CRM, you get to manage your customers and the customer data more efficiently.
Aside from maintaining customer profiles, you can keep track of the items they’ve purchased, how much they’ve spent, whether they’ve completed the purchase or abandoned their cart, and more.
Using this data, you improve customer experience by reaching out to them with targeted emails and discount offers.
Deals and Offers
Who likes a discount? We sure do! And we guess you do too.
Discounts and offers are a great way to drive more sales. Customers wouldn’t want to miss out on some great deals, whether it is a Buy One Get One (BOGO) offer or a discount sale.
In addition to driving more sales, offering discounts and offers help increase customer loyalty.
The native WooCommerce installation doesn’t come with the BOGO feature. But, just like everything else in WordPress, you have a plugin for the same.
So, what are the best WooCommerce plugins to incorporate BOGO deals? And how do you go about creating a BOGO deal in WooCommerce?
All this and much more are covered in our detailed guide on how to create WooCommerce BOGO deals. It also features some powerful tips for driving more sales.
As of 2025, the monthly active users on Facebook is roughly 2.91 billion, making it the most extensive social media network worldwide.
How about promoting your online marketplace to this vast audience base?
One of the best ways to reach out to your potential customers is Facebook marketing. By connecting your WooCommerce products to Facebook, you get to expand the reach of your store.
WooCommerce doesn’t come with a built-in feature to connect with your Facebook store. You have several plugins, such as Facebook for WooCommerce by Facebook, to do that.

Using such plugins, you can sync your WooCommerce store products with Facebook in real-time, analyze your campaigns using Facebook pixel, schedule the sync of your products to your Facebook shop, and a lot more.
The result is that you get to generate more sales with minimum effort.
Here’s a list of the plugins to connect your WooCommerce store to Facebook shop.
Subscriptions
Looking for an alternative to monetize your online marketplace?
Earning a percentage commission out of every sale that happens on your online store is one way you’ll make money out of your store.
However, there are additional methods, such as displaying Google Ads (via Google Adsense) and affiliate marketing. Another way is through subscriptions.
Subscriptions are excellent when you want to set up a recurring payment.
You could consider a lower percentage commission with your vendors and add in a layer of subscription. This way, you needn’t depend on the sales of their products to make a steady stream of revenue.
With the right WooCommerce subscription plugin, you can easily incorporate a subscription model into your online marketplace.
Check out the best subscription plugins for WooCommerce.
Online Marketplace FAQs
While we have covered everything you need to know about creating an online marketplace with WordPress, here we answer some frequently asked questions.
Is WordPress good for marketplace websites?
Yes. WordPress is the best marketplace CMS available that offers unmatched flexibility, scalability, and customization for your online business. Whether you are using the platform to sell physical products or digital products, WordPress, along with WooCommerce, offers you the best marketplace solution. And the best bit, you needn’t have to invest a whole lot to get started.
Can I build a marketplace on WordPress?
Yes, you can build a marketplace with WordPress! It makes it super easy to create an online marketplace similar to Amazon and eBay. WordPress and WooCommerce together offer a robust eCommerce platform that can then be converted into a multi-vendor online store using several extensions and plugins. Some of the plugins include Dokan, MultiVendorX, WC Vendors, among several others.
Is WordPress good for the multi-vendor marketplace?
Yes, WordPress is a good choice for your multi-vendor marketplace. All the more if you are starting out on a budget. With WordPress, you can get your online marketplace up and running pretty quickly. This way, you can test the water and gauge the success of your online store. You can always consider other platforms as your scale, but considering the popularity and flexibility of the platform, we guess you’d prefer using the combination of WordPress and WooCommerce.
How do I create a multi-vendor marketplace in WordPress?
To create a multi-vendor marketplace in WordPress, you start by installing WooCommerce. Once that’s done, you install a marketplace extension or plugin. One such plugin is Dokan. You then configure the plugin to work seamlessly with WooCommerce, and you should be good to go. Follow the detailed article to set up your online marketplace and get started.
How do I build my own marketplace?
Building your own marketplace is simpler than you imagined. Here are the 11 steps to building a successful online marketplace.
Step 1: Get a good web host capable of eCommerce
Step 2: Install WordPress
Step 3: Install WooCommerce
Step 4: Initial set up of WooCommerce
Step 5: Plugins to turn your WooCommerce online store into a marketplace
Step 6: Add products
Step 7: Set up shipping
Step 8: SEO and WooCommerce
Step 9: Tax and payments
Step 10: Optimize WooCommerce
Step 11: Test your store
We have covered all the steps in detail in this article.
Have You Created an Online Marketplace with WordPress?
Currently, the eCommerce industry is booming, and reports suggest that there’s no stopping this trend.
The pandemic has also got a lot of brick-and-mortar stores to consider having an online presence. This opens up a massive opportunity for those wanting to create an online marketplace.
On the one hand, the small and medium-sized businesses would like to have an online presence which opens up a new channel to generate sales. On the other hand, they may not have the technical expertise or want to invest in a team to build their online store.
By creating an online marketplace, you address these concerns. You get vendors queuing up to register on your platform. When they sell their products, you earn a commission. It’s a win-win for all!
Creating an online marketplace with WordPress is pretty straightforward. We’ve covered it all in this article. From installing WooCommerce to configuring a plugin to convert your store into an online marketplace, it’s all here.
Over to you now. Have you created your online marketplace with WordPress? Are you selling physical or digital products? Let us know!


Pratik Chaskar holds the pivotal role of CTO at Brainstorm Force, serving as the backbone of the company. Renowned for his organizational skills, strategic thinking, problem-solving attitude, and expertise in leading and executing plans, Pratik plays a crucial role in the BSF’s technological landscape.
Disclosure: This blog may contain affiliate links. If you make a purchase through one of these links, we may receive a small commission. Read disclosure. Rest assured that we only recommend products that we have personally used and believe will add value to our readers. Thanks for your support!


Very Informative and creative contents. This concept is a good way to enhance the knowledge. thanks for sharing. Continue to share your knowledge through articles like these, and keep posting more blogs.
Thank you for this valuable content. I would like to appreciate your time and effort in creating this meaningful information for us about the digital marketing. It’s very useful for the business and learner.